FOURTH NINE WEEKS
|
Sagmeister's List of "Things I have learned in my life so far"
|
|
|
Sagmesiter's List of "7 Rules for life and design happiness"
|
ARTIST RESEARCH
Include notes, direct quotes, images & reflections in response to at least two separate artists' works/philosophies) - This should be two or more pages on a single Google Doc (see guiding questions and other artists listed beneath these videos)
|
Guiding questions for your Artist Research Doc:
- What is the relationship of the work to the space it is shown in?
- What kind of materials are used and how do they play a role in delivering the message?
- Is this work permanent, temporary, ephemeral? Does time play a role?
- How does the viewer interact with the work in general? Is it require audience participation?
- What do you think is the artist’s intention in making this work?
- How do you relate to this work? What appeals to you about it or not?
Here is a list of various persons who use language, words and letterforms as the core or an additive to their work. Some of these artists are quite conceptual, but graphically arresting. You should evaluate the very specific visual messages accomplished by each one.
|
John Baldessari
Banksy Michael Basinski Sophie Calle Nancy Dwyer Guerilla Girls Jenny Holzer Robert Indiana Sister Mary Corita Kent |
Joseph Kosuth
Barbara Kruger Roy Lichtenstein Glen Ligon El Lissitzky F.W. Marinetti Bruce Nauman Alexander Rodchenko Kay Rosen |
Ed Ruscha
Kurt Schwitters Stuart Semple Lorna Simpson Saul Steinberg Lois Templeton Carrie Mae Weems Lawrence Weiner William Wiley Christopher Wool |
PROJECT PLANNING
(On a new Google Doc) Include a list of 10-20 "Things you have learned in your life so far" and 5-10 "Rules for Life and Photography/Art/Design Happiness" (move this from your Artist Research Doc if you already started)
You CANNOT have a generic message. Aim for specificity. Expand on your original message outlined above and dig deeper to get to the core of what you are trying to express. Try coming at the idea from a completely different angle. Perhaps try humor, sarcasm, and then seriousness. Explain your revised idea (label this REVISION 1)
NOW REVISE IT AGAIN!!!
Rinse and repeat. (label this REVISION 2)
Requirement: Work out rough sketches on paper, photograph or scan them, and add to your document.
NOTE: We will be sharing this planning document for small group critiques on your initial idea + two revisions in order to get to a final plan of action. Be prepared with images and/or materials to work with during each block next week. You must participate fully to receive credit. We will have a midway critique on Friday to evaluate your progress and to push each other forward.
YOU MUST INCLUDE A PHOTOGRAPH OF THE NOTES YOU TOOK WHILE GETTING RESPONSES FROM YOUR GROUP OR TYPE THEM DIRECTLY. THIS SHOULD BE AT THE END OF YOUR PLANNING DOC WITH THE HEADING "FEEDBACK." BELOW THAT TYPE ANOTHER HEADING, "PLAN OF ACTION." THIS SHOULD INCLUDE A DETAILED OUTLINE OF THE SPECIFIC TASKS YOU WILL CARRY OUT OVER THE NEXT WEEK.
(On a new Google Doc) Include a list of 10-20 "Things you have learned in your life so far" and 5-10 "Rules for Life and Photography/Art/Design Happiness" (move this from your Artist Research Doc if you already started)
- Highlight 1 of these items and outline what you plan to carry out for this assignment (label this IDEA 1)
- Explain how you want to create this message and document it with graphics, still images, and/or video.
- Remember:
- Your main subjects, your use of materials, and the specific locations must all connect back to your meaning!
- Visuals AND Text must be of equal importance in this piece, although one or the other may dominate.
You CANNOT have a generic message. Aim for specificity. Expand on your original message outlined above and dig deeper to get to the core of what you are trying to express. Try coming at the idea from a completely different angle. Perhaps try humor, sarcasm, and then seriousness. Explain your revised idea (label this REVISION 1)
NOW REVISE IT AGAIN!!!
Rinse and repeat. (label this REVISION 2)
Requirement: Work out rough sketches on paper, photograph or scan them, and add to your document.
NOTE: We will be sharing this planning document for small group critiques on your initial idea + two revisions in order to get to a final plan of action. Be prepared with images and/or materials to work with during each block next week. You must participate fully to receive credit. We will have a midway critique on Friday to evaluate your progress and to push each other forward.
YOU MUST INCLUDE A PHOTOGRAPH OF THE NOTES YOU TOOK WHILE GETTING RESPONSES FROM YOUR GROUP OR TYPE THEM DIRECTLY. THIS SHOULD BE AT THE END OF YOUR PLANNING DOC WITH THE HEADING "FEEDBACK." BELOW THAT TYPE ANOTHER HEADING, "PLAN OF ACTION." THIS SHOULD INCLUDE A DETAILED OUTLINE OF THE SPECIFIC TASKS YOU WILL CARRY OUT OVER THE NEXT WEEK.
ORGANIZE YOUR GOOGLE DRIVE! Create a new folder titled "Life Lessons"
Item # 1: Artist Research (Single Google Doc covering both artists with supporting images and text)
Item # 2: Project Planning (Single Google Doc with your Life Lessons, Idea 1, Revision 1, Revision 2, Feedback, Plan of Action)
Item # 3: Daily Log (Single Google Doc with dated entries for accomplishments and reflections - documentation images are required!!)
DOWNLOAD THE GOOGLE DRIVE APP TO ADD IMAGES TO YOUR LIFE LESSONS FOLDER: Google Play for Android OR iTunes for iPhone
1. Use your HCPS login and find your "Life Lessons" folder under A4
|
2. Click on the plus sign in the lower right corner

|
3. Select the "Upload" icon

|
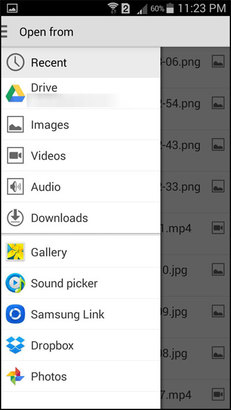
4. Use drop down menu in top left corner and click "Images"
|
5. Choose your camera roll and then upload one image by simply clicking once or click and hold to make a selection of multiple images.
Begin Building Your Own Photography Portfolio Website!

Examples: 40 Great Photography Portfolio Sites
|
Instructions: Go to http://students.weebly.com - enter username & password = FirstInitialLastNameStudent# (no spaces). These will remain active for one year. You will be asked to create a domian name for this site. You may choose anything that is available (http://_________________.weebly.com).
Go to "Theme" to select the type of site you wish to create, then go to "Pages" to add the three required below, then go to "Build" to drag and drop content. You will need to be working simultaneously in Google Drive to organize the works you want to include in your portfolio. You will be working to scan any Silver Gelatin Prints and Alternative Processes. |
Requirements:
Pages: Home, Resume, Portfolio, Artist Statement. Additional pages are optional.
Portfolio Galleries: Include Silver Gelatin Prints (5), Alternative Processes (5 - pinhole, photogram, sabattier, lith prints and transparencies, liquid emulsion), Digital Images (5), Photoshop Composites (5) + 5 of your choice to get you to a total of 25 final portfolio pieces. Be sure to include captions on each image to designate the title, process, and year completed.
2017 PHOTOGRAPHY II
|
PORTFOLIO WEBSITE GRADING CRITERIA:
HOME PAGE (Score_____ / 10pts)
RESUME PAGE (Score_____ / 10pts)
PORTFOLIO PAGE (Score_____ / 20pts)
|
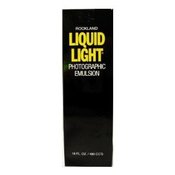
LIQUID EMULSION
Week 1-2
|
Liquid Emulsion:
This is a silver-based sensitizer for applying on any surface, exposing by an enlarger, and processing in conventional chemistry. It is virtually the same emulsion found on ordinary photographic paper, but in a liquid form and can allow the emulsion to be coated on a wide range of surfaces. Speed and Contrast: When freshly-made, liquid light is relatively slow and lacks full contrast. As it ages, it becomes faster and more contrasty. You can obtain maximum speed and contrast at any stages by adding a small quantity of working developer to the emulsion, as described below. NOTE: The emulsion can leave black stains on working surfaces and needs to cleaned up immediately. |
STEP 1: Safe Light
Use safelight while coating but when emulsion is drying and for storage total darkness is recommended.
At room temperature, liquid light is a solid gel and before use the bottle must be soaked in a container of hot water until it becomes a liquid at about 110 Deg F. It is not necessary to melt the entire contents if only a portion is to be used as the mixture is of a similar consistency throughout and in fact shaking the bottle will cause bubbles to form which can effect the application of the emulsion.
STEP 2: Increasing density and sensitivity
A small, precisely-measured amount of paper developer added to liquid light just before use will give maximum speed and contrast. Add exactly one part of working developer to 10 parts of liquid light. Example: Add 15ml of dektol diluted 1:2 (Not stock or concentrated solution, but what is prepared in the paper developing trays) to 150ml of liquid light. Mix well, and coat this mixture during the same day. (Once coated and dried, material can be stored of an indefinite period).
STEP 3: Applying liquid emulsion
Use a brush, small sponge or a nap type paint applicator, by using a paint roller, spray gun, or by flowing on the emulsion and draining off the excess. At the same time, coat a few pieces of paper or file cards with the same mixture to serve as test strips to calculate the correct exposure. Like paint, too thin a coating of liquid light will show streaks and brush stokes. If an even coating is required, two thin coats will cover better than one and the second can be applied after the first has become tacky or dried. As you are applying the solution, remember to keep the emulsion warm in a water bath as it will begin to set again if it becomes cool.
STEP 4: Exposure
Liquid light can be exposed once it is dry by using an enlarger, contact printing, or by a slide projector. Liquid light is slower than normal enlargement papers and requires a longer exposure time. Suggested exposure for an 8×10 from a 35mm neg enlarged full frame is about 20sec @ f5.6 (2 stops down from the widest opening)
STEP 5: Processing liquid emulsion – development
For preparations on paper, develop like a normal print in a tray, or for other surfaces paint the developer on with a brush or sponge. A developer like Dektol diluted 1 part with 2 parts water. It is important that while the temperature of the developer is warm it is not above 70 deg F or 21 deg C. to avoid melting of the emulsion.
STEP 6: Fixing
Do not rinse with water or use a stop bath after developing. Use two consecutive identical hardening fixer baths. The first acts as a short stop; immerse for a few seconds to neutralize the developer. Next place in the second bath for 10 min or more until the chalky white pigment disappears, leaving the highlights completely transparent. (The second fixer should always be new and some agitation should be used).
STEP 7: Washing
Wash in the normal manner for at least 10 min in running water.
Source: http://www.alternativephotography.com/wp/processes/liquid-emulsion/the-liquid-emulsion-process
THIRD NINE WEEKS
Week 1-2
Finalize Career Portfolios
Week 3
Career Presentations
Week 4
Lith Printing Research
Process Description
What is a “lith” print? It involves extreme overexposure of a film negative onto photo paper that is processed in a very diluted developing solution.
How does it work? Kodalith developer was originally used for orthochromatic film, but when paper is used the process yields a "colorized" image often with a grainy texture.
Darkroom Setup Instructions
Safelight: With both exposure and development times increased, the risk of "fogging the image" is also increased so the safelight must be very dim.
Darkroom torch: This is a small handheld LED flashlight with a red film which acts as a miniature safelight to examine prints while in development - WARNING: shining this light too early can cause fogging on the print.
Chemicals and dilutions: Kodalith developer requires equal parts A and B.
Selecting a Suitable Negative: Since this process yields high contrast, it is recommended to begin with an image that has the fullest range of values.
Photo Paper Options: Kentmere, Forte, Fomatone, and Warmtone fiber based papers have the best results. Unfortunately these papers are not very difficult to get.
Printing Process – Step by Step
Exposing the print: Exposure times can be expected to be 2-3x longer.
Infectious development: The developing process begins very slowly, then gradually progresses, and near the end rapidly increases.
Snatch point: If the image is not snatched at the appropriate moment, it will be lost.
Stop, fix, and wash: These stop and fix are normal times. Avoid overfixing because this will eliminate delicate tones in the highlights. The wash time is double for fiber based papers.
Controlling highlights: The highlights are controlled by the exposure time. If more detail in the highlight ares is needed, then a longer exposure time can be used to achieve more grey tones. If the exposure time is increased, the highlights will become more intensely white with an increase in contrast.
Controlling shadows: The shadows are controlled by development times. Use the darkroom torch to view the darkest shadow area and as soon as it is solid black, this is your snatch point to quickly remove the image from the developer and place it in the stop bath.
Controlling color, texture contrast: More diluted developer causes stronger color variations and granulated textures. The exposure time controls the amount of contrast. Decreasing the time will increase contrast, and increasing the time will decrease the contrast.
*Maturation: With each developing attempt, the developer solution matures and produces a new effect. No two images will ever be identical.
*Degradation: The developer will reach a point where it has fully matured and it becomes increasingly exhausested and it simply stops working.
*Selenium Toning: With lith prints, this toner can yield deep burgundy and ever purple coloration with intensely white highlights
Week 5 - 7
Complete 2 Lith Paper Prints and 2 Lith Transparencies
Week 8
Mat Lith Project
Begin Portfolio Websites
Week 9
Continue adding portfolio work to your personal website
SECOND NINE WEEKS
Week 1
Complete Memoryscape Project
Week 2
TUE 11/15
Critique Memoryscapes
THU 11/17
Intro to Digital Photography Packet - Due Monday!!
Critique Memoryscapes
THU 11/17
Intro to Digital Photography Packet - Due Monday!!
Week 3
MON 11/21 - Turn in Intro Packet in to be graded
Review Resolution, Layers, and Masking in Photoshop:
IMAGE SIZE / RESOLUTION - http://psd.tutsplus.com/tutorials/tools-tips/pixels-image-size-resolution-photoshop/
LAYERS BASICS - http://psd.tutsplus.com/tutorials/tools-tips/photoshop-layers/
MASKING - http://psd.tutsplus.com/tutorials/tools-tips/masking-photoshop/
Check out digital cameras - due back no later than MONDAY 11/28 - Save the battery, because chargers stay here!!
Set Image Quality to "Large"
"Format" card to erase images (before shooting & then after images are downloaded!)
50+ Digital Files due by Monday 11/28
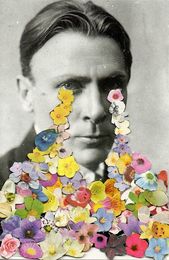
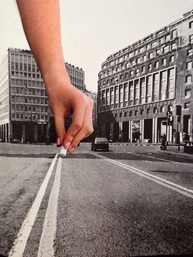
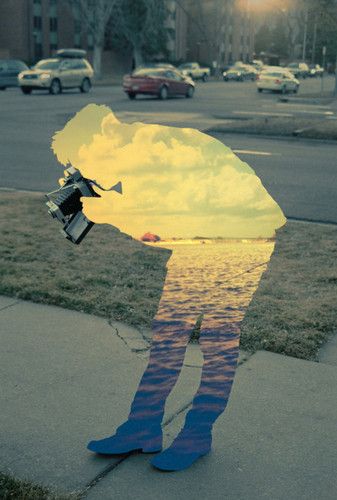
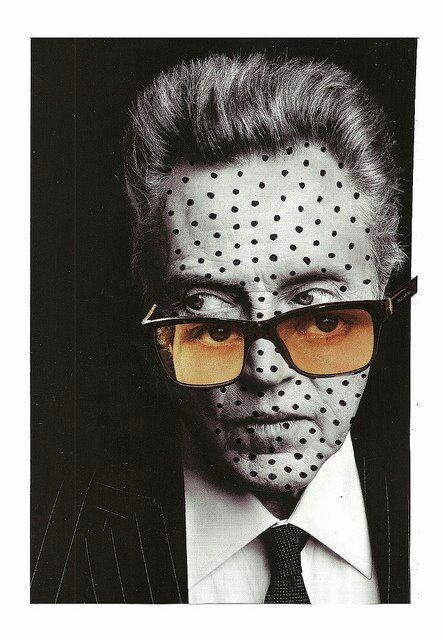
Photoshop Mask Challenge
Assignment: Your goal is to bring in multiple layers onto a single Photoshop file and work with masking to blend them seamlessly. These individual layers can include digital images and scanned items (darkroom prints, documents, textures, ect…). There should be a specific concept that drives your purpose for combining these different elements. Consider how we used the darkroom to combine imagery that would allude to a specific memory. Start with a subject that is meaningful to you and determine ways you can communicate something about it. The camera is a tool that can describe what something looks like, but your job as an artist is to give us much more than a visual description of your subjects. You should be striving to communicate perhaps what is not immediately visible to the viewer. Your message should be specific, direct, and all the visual choices you make should support what you are trying to express. Consider telling a story or taking a stand on what matters most to you. There will be another artist statement required for you to justify the choices that you made in both selecting and combining your chosen elements.
Assignment: Your goal is to bring in multiple layers onto a single Photoshop file and work with masking to blend them seamlessly. These individual layers can include digital images and scanned items (darkroom prints, documents, textures, ect…). There should be a specific concept that drives your purpose for combining these different elements. Consider how we used the darkroom to combine imagery that would allude to a specific memory. Start with a subject that is meaningful to you and determine ways you can communicate something about it. The camera is a tool that can describe what something looks like, but your job as an artist is to give us much more than a visual description of your subjects. You should be striving to communicate perhaps what is not immediately visible to the viewer. Your message should be specific, direct, and all the visual choices you make should support what you are trying to express. Consider telling a story or taking a stand on what matters most to you. There will be another artist statement required for you to justify the choices that you made in both selecting and combining your chosen elements.

|
|
|
|
|
|
Artist Examples:
Merve Ozalsan - catesthill.com/2014/02/25/natural-act-collages-by-merve-ozaslan/
Ben Giles - http://catesthill.com/2012/01/31/artist-ben-giles-collages-an-apt-post-after-stella-mccartneys-spring-2012-campaign-below/
Merve Ozalsan - catesthill.com/2014/02/25/natural-act-collages-by-merve-ozaslan/
Ben Giles - http://catesthill.com/2012/01/31/artist-ben-giles-collages-an-apt-post-after-stella-mccartneys-spring-2012-campaign-below/
Week 4
MON 11/28 - FIRST 50 DIGITAL IMAGES DUE TODAY (NEXT 50 DUE NEXT TUESDAY)
Review Masking and Layering in Photoshop:
CLIPPING MASK - http://psd.tutsplus.com/tutorials/tools-tips/clipping-masks/
ADJUSTMENT LAYERS - http://psd.tutsplus.com/tutorials/tools-tips/adjustment-layers-photoshop/
LETS CHANGE THE BACKGROUND - http://psd.tutsplus.com/tutorials/photo-effects-tutorials/color-range/
CLIPPING MASK - http://psd.tutsplus.com/tutorials/tools-tips/clipping-masks/
ADJUSTMENT LAYERS - http://psd.tutsplus.com/tutorials/tools-tips/adjustment-layers-photoshop/
LETS CHANGE THE BACKGROUND - http://psd.tutsplus.com/tutorials/photo-effects-tutorials/color-range/
Download images to your desktop - Go to Google Drive and add a folder under Photo II titled "Photoshop Challenge" - Drag and drop your image files here - Then begin experimenting in Photoshop
Requirements:
Use Photoshop to alter and combine AT LEAST four digital images (and/or scans) to create a total of THREE unique compositions that will work together as a triptypch.
Composition #1. Use adjustment layers to alter one or more selections
Composition #2. Use masking to combine one or more images
Composition #3. Use blending to combine one or more images
REMINDER FOR MASKING: white reveals, black hides
*You may choose to create several varieties of compositions and then choose your top 3
WED 11/30 - Work on 1st Photoshop Composition
FRI 12/2 - 1st Photoshop Composition Due (Must be turned into your Google Drive!!)
FRI 12/2 - 1st Photoshop Composition Due (Must be turned into your Google Drive!!)
Week 5
TUE 12/6 - NEXT 50 DIGITAL IMAGES DUE
Review Masking, Selections and Blending in Photoshop:
MAKING FAST SELECTIONS - http://psd.tutsplus.com/tutorials/tools-tips/selections/
BLENDING MODES - http://psd.tutsplus.com/tutorials/tools-tips/
ALIGNING AND BLENDING IMAGES TOGETHER - https://design.tutsplus.com/tutorials/aligning-and-blending-images-together--psd-13285
(More on Making Selections, More on Adjustment Layers, More on Blending)
Week 6 |
|
COMPLETE ALL 3 PHOTOSHOP COMPOSITIONS AND TURN INTO GOOGLE DRIVE FOLDER - Place in separate folder with a PSD version and a JPEG version for each file
Week 7
PHOTOGRAPHY CAREER PROJECT
|
SLIDE PRESENTATION: The purpose of this assignment is to allow you to align your current interests and expertise with a possible career in photography. This assignment is going to help you gain important resume building skills while also allowing you to expand your understanding of the photographic profession. You will be preparing slides that will act as a mock application for your photography career choice. You will set the date to four or five years from now (based on your high school graduation date). This way you will be applying with the educational or work experience necessary to achieve your desired position. All the information in your slides must be real, though of course this is a hypothetical assignment. Direct your research in finding actual positions and opportunities available in the location of your choice (one which you are seriously considering for your future). The jobs do not have to be currently available, but they do have to exist.
SHOOTING ASSIGNMENT: You will ultimately be producing a portfolio of images that will allow you to compete for the position of your choice. You will have the option to complete darkroom or digital work (or a combination of both!) |

|
STEP ONE - Career Profile: Begin your research by choosing one of the careers listed below as your focus. Feel free to offer suggestions for additional careers not listed below. You will need to find descriptions and examples of professional work within your chosen career. Be sure to document your research and sources.
POSSIBLE PHOTOGRAPHY CAREER CHOICES:
|
Photography & Journalism/Media
Photojournalist (Newspapers, Magazines, Online Articles/Blogs) Director of Photography (Movies) Wedding Photographer Street Photographer Photo Editor Portrait/Family Photographer Photography & History Historical/Documentary Photographer War Photographer Photo Historian Archivist Photography & Athletics Action/Sports Photographer Photography & Music Portrait Photographer (Cover Art, Music Videos) Concert Photographer Photography & Advertising Product Photographer (Studio Still-Life) Fashion Photographer Travel Photographer Commercial/Stock Photographer Food Photographer Vehicle Photographer Real Estate/Architecture Photographer Retouch Artist |
Photography & Science
Aerial Photographer Scientific Photographer (Anatomy, Archaeology, Astrology) Criminal Photographer Medical Photographer Nature Photographer (Animal, Botanical, Landscape) Underwater Photographer (Oceanography) Pet Photographer (Biology) Camera Technician Lighting Technician Darkroom Technician (Chemistry) Photography & Education Photography Teacher (K-12) Photography Professor (Higher Education) School Photographer Photography & Art Art Critic Illustrator Mixed Media Artist Color Restorer Museum Curator More Sources: 30 Types of Photographers - Which Are You? If Not a Photographer, Which Would You Rather Be? |
STEP 2 - Job Profile: Find REAL jobs that are within our area and/or other areas in which you would like to live in the future (they do not have to be hiring at the moment). Include entry level positions as well as jobs available to experts. Seek the following information for each job: Title, Company & Location, Responsibilities, Knowledge & Skills, Years Experience, Degree Requirements, Salary Range. Be sure to document your research and sources.
STEP 3 - APPLY FOR THIS JOB!!
Create a new Google Slide titled: "Photography Career" Application ("insert your career choice")
Slide 1: Identification/Objective
This is the opening slide. Be sure to identify who you are. Include your full name and email address. Since we’re thinking ahead, set the current date for five years from now.
Slide 2: Career/Job Profile
State who you want to work for, what position you are interested in, and what you want to do for your dream job in the field of photography. Give a clear description of the company and highlight the specific skills, years of experience, and/or degree requirements that are necessary for this job.
Slide 3-12: Career Examples
Include 10 examples of professional work within that career (one image per slide).
Provide information on each artist including their name, who they were working for, and when they photograph was taken.
Slide 13: Work Experience (Imaginary Resume)
Find three or more positions in your area or the areas in which you would like to live. Include the name of the employer, location, position title, dates of employment, and statement of duties or accomplishments. List the most recent first (most experienced to least experienced). You must cover the years from 2016-2021.
Slide 14: Education (Imaginary Resume)
List all relevant education, training, and certifications. Include degree(s) awarded, school(s) attended, dates of attendance, along with program/major courses. List the most recent first. High School will be listed last.
Slide 15: Qualifications & Skills (Imaginary Resume)
List your own qualifications, skills, and achievements. These can be technical skills both in and outside of the darkroom. Be sure to offer your experience working with any other art materials and/or computer software.
Slide 16: Awards & Honors / Activities & Associations (Imaginary Resume)
Highlight any formal recognition you have received (professional, academic, or extra curricular). Provide the name of professional associations, clubs, or community activities in which you participate.
Slide 17: Project Glimpse
Your goal is to add work to your portfolio that BEST exemplifies your qualifications and skills in a UNIQUE way. It is a competitive world out there and you need to utilize your strengths in order to be successful. Explain the process you went through to get the very best outcome for this assignment. Include shooting requirements, all necessary materials, and anticipated results. Be sure to list the people involved as well.
Slide 18-22(-26): Photography Career Portfolio
5-8 Final Images
Week 8
Make a career choice, find a specific job, and begin building slides (5 should be completed by the end of this week)
Week 9
17 slides due by Friday (+6 more by Wednesday + 6 more by Friday)
Portfolio Images DUE AFTER EXAMS (Digital or Film - YOUR CHOICE!)
Portfolio Images DUE AFTER EXAMS (Digital or Film - YOUR CHOICE!)

FIRST NINE WEEKS
Week 1
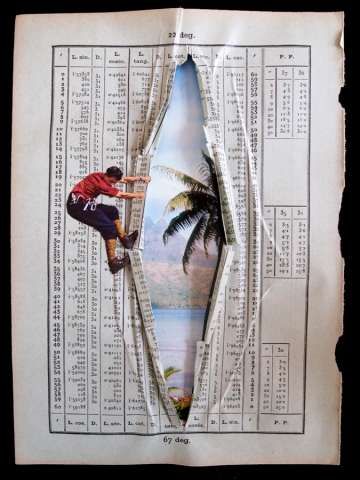
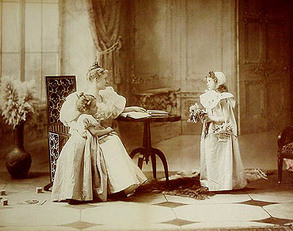
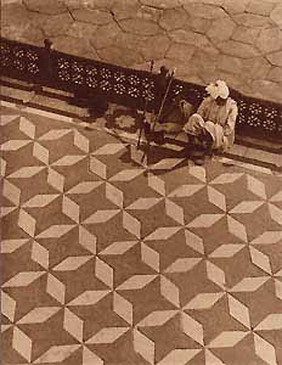
Photography's Impact on the Art WorldMODERNISM was a major shift in art, literature, and music, which evolved during the first two decades of the twentieth century. Modernism implies a rejection of previous conventions in favor of radically different forms of personal and artistic expression.
The advent of photography is often credited with triggering this revolution in painting. Since the camera could produce such perfect transcriptions of reality, artists were suddenly forced to be more than clever copyists of nature. This led them to such new ideas as Impressionism. Although modern art as a term applies to a vast number of artistic genres spanning more than a century, aesthetically speaking, modern art is characterized by the artist's intent to not only portray a subject as it exists in the world, but according to his or her unique perspective. This practice represents the beginnings of abstraction in the visual arts. Photography, too, went through its own dramatic changes as part of the broader shift to Modernism. Most historians date the beginnings of Modernism in photography to the Photo-Secession, a movement founded by Alfred Stieglitz in 1902. The two images to the right demonstrate this shift in photographic conventions. On the top is a photograph from 1896 and the bottom was taken between 1934 or 1935. What about the top image do you consider conventional? What is unconventional about the bottom image? www.photographymuseum.com/modernism1.html http://www.theartstory.org/definition-modern-art.htm |
|
|
MODERNISM CHALLENGE #1 (groups of 3-4)
ONLINE SEEK & FIND
HW DUE FRIDAY = Get Syllabus Signed, Turn in Art Guild/NAHS Dues, Bring Film Cassettes, (optional - Bring Digital SLR cameras) THU 9/8 MODERNISM CHALLENGE #2 (groups of 3-4) ATLEE SEEK & FIND
|
|
MODERNISM CHALLENGE # 3 (individual)
ELEMENTAL PORTFOLIO
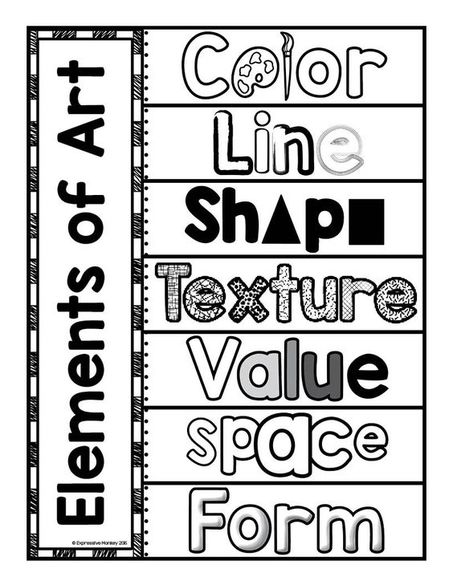
LINE - SHAPE - TEXTURE - VALUE - SPACE - FORM
Assignment: Plan out a series of images that are connected by subject or theme to complete a cohesive set of portfolio prints. Study the details of your setting and compose your subject in a way that brings attention to each of the design elements individually. Concentrate on finding you own unique perspective, which may begin to abstract your subject (like the modernists!)
Generate an underlying theme to tie each one of the images together in a cohesive series.
Requirements: Shoot at least 4 rolls of film and turn in at total of 6 - 8x10's (one per design element) - see deadlines below
ELEMENTAL PORTFOLIO
LINE - SHAPE - TEXTURE - VALUE - SPACE - FORM
Assignment: Plan out a series of images that are connected by subject or theme to complete a cohesive set of portfolio prints. Study the details of your setting and compose your subject in a way that brings attention to each of the design elements individually. Concentrate on finding you own unique perspective, which may begin to abstract your subject (like the modernists!)
Generate an underlying theme to tie each one of the images together in a cohesive series.
Requirements: Shoot at least 4 rolls of film and turn in at total of 6 - 8x10's (one per design element) - see deadlines below
Load 2 Film Cassettes
HW = Start shooting two rolls of film to complete the first 3 elements of your choice
HW = Start shooting two rolls of film to complete the first 3 elements of your choice
Week 2
MON 9/12
Group Presentations - Title = name of element, share with [email protected]
Requirements: Definition slide, 2 photographer examples + 2 of your own examples per group member
Present your images with an explanation of HOW the element is used (Principles of Design cheat sheet)
WED 9/14
Develop 2 rolls of film
FRI 9/16
Make Contact Sheets + 1 print
Reload 2 Film Cassettes
HW = Shoot two more rolls of film to complete the last 3 elements
Week 3
TUE 9/20 - Develop 2 Rolls of Film
THU 9/23 - Make Contact Sheets + 1 print
THU 9/23 - Make Contact Sheets + 1 print
Week 4
MON 9/26 - Make 2 prints
WED 9/28 - Make 2 prints
FRIE 9/30 - Turn in all 6 prints
WED 9/28 - Make 2 prints
FRIE 9/30 - Turn in all 6 prints
Alternative Assignment: PAUL STRAND - THE MASTER OF MODERN PHOTOGRAPHY - View Paul Strand's Portfolio Here
- Create a new Google Doc in your A4 folder (shared with me) and number it 1-15 - type "Element" and "Principle" below each #
- Next to "Element" - Explain which design element dominates each of the 15 compositions
Elements of Design Include: LINE, SHAPE, TEXTURE, VALUE, SPACE, AND FORM - Next to "Principle" - Include a description of the principle of design that is best demonstrated in each of the 15 compositions
Principles of Design Include: BALANCE, CONTRAST, EMPHASIS, MOVEMENT, PATTERN, REPETITION, RHYTHM, PROPORTION, PERSPECTIVE, VARIETY, UNITY
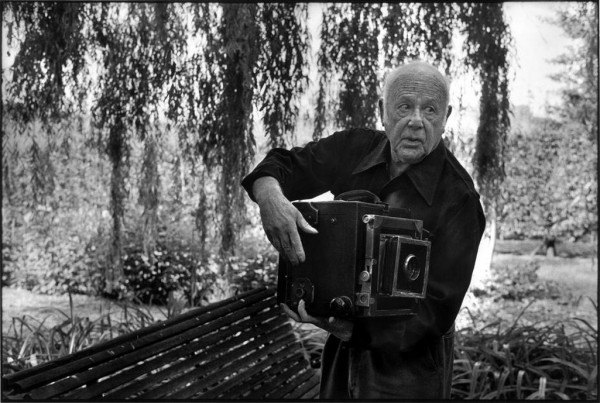
- The distinctive place Paul Strand holds in the history of modern photography rests on his extraordinary artistic talent as well as his belief in the transformative power of the medium in which he chose to work. From his early experiments with street photography in New York to his sensitive portrayal of daily life in New England, Italy, and Ghana, Strand came to believe that the most enduring function of photography and his work as an artist was to reveal the essential nature of the human experience in a changing world. He was also a master craftsman, a rare and exacting maker of pictures. http://artdaily.com/news/73822/-Paul-Strand--Master-of-Modern-Photography--opens-at-the-Philadelphia-Museum-of-Art#.V87921srJkg
Alternative Assignment: PHOTOGRAPHY COMPETITIONS
Week 5
TUE 10/11 - Critique Elemental Portfolios
Review Photo Manipulations
Begin Experiments (1st process: 2 examples)
THU 10/13 -Continue Photo Manipulation Experiments
Review Photo Manipulations
Begin Experiments (1st process: 2 examples)
THU 10/13 -Continue Photo Manipulation Experiments
Photo Manipulation Options:
Darkroom Techniques:
Darkroom Techniques:
- Sandwiching Negatives: Place two negatives into the negative carrier to expose the images simultaneously.
- In areas where one negative is dense, it will hold back detail from the other negative.
- Where one negative is thin, the detail from the other will pass through.
- Sandwiching negatives creates a greater amount of density, which leads to longer exposure times and reduced contrast.
- *For best results:
- Combine a simple image with a more complex one in order to avoid combining two images that are overwhelming with too much detail.
- Negatives that have less density generally work better when combined so you may want to slightly underexpose your film.
- Dodge the shadow areas to allow for more detail to pass through.
- You will need to pre-plan your composition to shoot your subjects with the proper proportions (how close you are) and proximities (where it is placed in the viewfinder) since the negatives will be exposed simultaneously.
- Photogram: While exposing the negative lay objects or text directly onto the photo paper or into the negative carrier to hold back the light.
- *For best results:
- Expose the object first to create a black surrounding area, then expose the image to appear within that negative shape
- *For best results:
- Cliche Verre: Painting or drawing on a transparent surface that is layered while printing
- Manipulating Negatives: burn, scratch, distress, bleach, cut, glue, or paint negatives
- Printing Full Frame with Handmade Negative Carrier: Use glass or paper negative carrier slightly larger than the image to show with textured edges
- Multiple Exposures: While shooting, expose two images onto a single negative.
- * For best results:
- You do not want large light areas, because it will block out any subsequent image.
- Try placing of a dark area in the first exposure where you would like a light area to shine through on the second exposure.
- * For best results:
- Lens Filters or Diffusers: Place a textured material around the edges of the lens, shoot through a semi-transparent surface to blur and abstract forms, or work with cutouts to block a portion of the exposure
Alternative Assignment: PHOTO MANIPULATIONS - Add 10 or more examples of the photo manipulations listed above - Include the artist name, title, date, media, and a description of the technique (leave any of the information blank if it cannot be found, or guess)
The Delights of Seeing: Sandwiching Negatives and Multiple Exposures
Photo JoJo: Photo Filters on the Cheap
Photo JoJo: Photo Filters on the Cheap
Week 6
MON 10/10 - Memoryscape Introduction
WED 10/12 - Complete Experiments (2nd process: 2 examples) - Turn in all 4 with name and process label (hang on the wall)
Begin research for Memoryscape assignment
Creative Writing assignment: Choose one print (it can be your own or choose someone else's) and write a memory to be displayed right next to it (use your imagination and speak in the first person - though that person does not have to be you - use your language to allude to your age and personality)
FRI 10/14 - Memoryscape research and planning

Assignment: Create a Memoryscape by combining history and photography to reveal a specific memory. The past event can represent either a personal or cultural experience. A Memoryscape should ultimately address the passage of time and remind us of our shared humanity. You will conduct either physical research (digging through actual materials) and/or online research (exploring digitally archived materials) to find primary sources that can deepen your understanding of an event that transpired. This chosen source (document, drawing, photograph, or recording) should be displayed alongside your final project or be incorporated within it. You must use one or more of the photo manipulation techniques to alter you image(s) to allude to a memory. You will write an artist statement to accompany your work in the final exhibit that expresses the reasoning for your visual and conceptual choices.
|
Discussion Questions:
· What is a memory? · How do you define the past? · How is the past remembered? · What do we leave behind as our personal histories? |
|
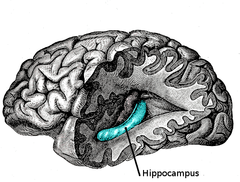
Human Memory and the Photograph
Memories of our experiences connect with one another and they are the basis of who we are as individuals. Memories of our experiences are called autobiographical memories and they rely on a brain region called the hippocampus. If the hippocampus were to be taken out of your brain right now, you would be stuck in time and memories of new experiences would rapidly fade away. The hippocampus functions to create a seamless story of the self. It’s pretty clear that there is a connection between human memory and the photographs we take. Simply put, a photo is information about past light that we can perceive in present time. Similarly, memories are the affects of our past experiences on our present self. Photographs can serve as memory storage and, when viewed, can activate memory recall.
The basis of our autobiographical memory is what happened, where it happened and when it happened. Similarly, the photos we take can store information of what, where and when. In this regard, a photograph is very much like a memory of a life event.
Source: http://petapixel.com/2013/07/20/memories-photographs-and-the-human-brain/
To say that what we see in photographs is gone is to state the obvious. At the very least that particular moment is gone, never to come back, just like any other moment (whether we photograph or not). The person in the photo might be gone, in all kinds of ways. Gone from our life maybe, either by our choice or their choice or maybe by nobody’s choice (in the case of death). The fact that something is gone makes photographs so poignant, and it is what makes photographs memories. This, again, is obvious, because memories concern the past. Photography is the past (maybe more accurately a past). To look at a photograph is to look at the past.
In the case of photographs, we have more power over the process of retaining and forgetting. The process here involves the decision to take a photo or not, and then later whatever is later involved in the editing. Seen in this light, photographs are more perfect memories, because we are given more power to control our past (if we had that power with our actual memories, most therapists would be out of work). Conveniently, we tend to ignore the fact that photographs are manufactured memories. Photographs are also expressions of our desire to hold on to something. As such expressions, they can take on their own life, essentially becoming something completely different. Source: http://jmcolberg.com/weblog/extended/archives/photography_and_memory/
What role does memory play in art?
Article: Tate, Khan Academy - Archives, Memory, and Conservation
Source:https://www.khanacademy.org/partner-content/tate/archives-memory/art-and-memory/a/what-role-does-memory-play-in-art
Some artists try to document things exactly as they are in order to create a record for future generations. But others deliberately frame the past in different or unexpected ways to change the way we think about history. So how does art shape our collective memory of the past? And how might it inform our experience of major events in our own time?
There will inevitably be tension between an object invented by a subjective mind and the objective fact or event it is meant to depict. Many artists use art to tell stories about personal and cultural memory that are open to interpretation, that reframe the past not as a fixed narrative but as a multiplicity of voices from diverse points of view. This allows us to think twice about our history and how it has been shaped, and how we might best document things to come.
Explore the Visual Qualities
Description: Begin by describing what you see occurring in the photograph. What details stand out to you? What are the subjects being photographed?
Analysis: How is the photograph composed? How is the use of light, shadow, perspective, or framing used? What elements or principles of design stand out the most?
Analysis: How is the photograph composed? How is the use of light, shadow, perspective, or framing used? What elements or principles of design stand out the most?
Consider the Conceptual Qualities
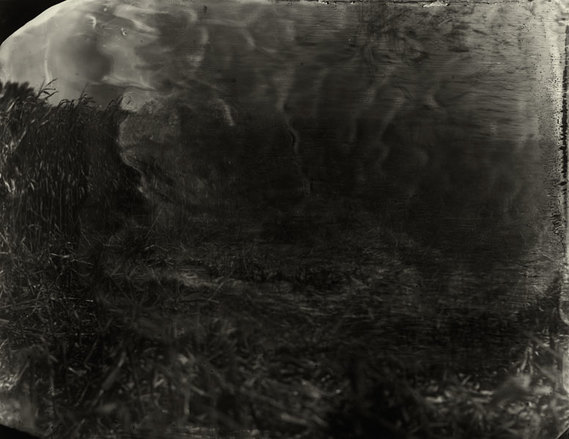
Sally Mann: b. Lexington, VA 1951 - Title: Antietam - Date: 2003
Interpretation: What role does the title/caption hold? Why do you think the photographer chose this subject to photograph? What is the significance of the historical event being photographed? What story do you think is being told? What details support your interpretation? How does this image inform our understanding of the aftermath of war or conflict?
Evaluate the Context
About the work:
“This image belongs to Virginia photographer Sally Mann’s Last Measure series, titled after a line in Lincoln’s Gettysburg Address and based on her visits to Civil War battlefields. Untitled #9 shows a cornfield beside “Bloody Lane,” the sunken road where thousands of men lost their lives on this most deadly day in American history. Although clear at the left edge, the field dissolves across the surface into an abstract cloud of photographic emulsion that conveys something of the strife and anguish described in eyewitness accounts. Mann’s bold experiments with the nineteenth-century collodian wet-plate process—in which she pours photosensitive emulsion onto a glass plate shortly before exposure—help her transcend photography’s realist conventions to achieve a heightened level of expression.” Source:https://vmfa.museum/connect/antietam-and-the-civil-war-another-artists-perspective/#c4hsSCxt3eqWaA2x.99
About the battle
On September 17, 1862 and 160 miles north of Richmond, a horrific battle near Sharpsburg, Maryland, and Antietam Creek marked the turning point in the Civil War. It was the first major confrontation in the conflict to take place on Union soil and remains the single deadliest day in American history with over 23,000 casualties on both sides (comparable to 230,000 in contemporary numbers). While not a decisive victory for either North or South, it gave President Lincoln the political incentive to issue just five days later the preliminary Emancipation Proclamation—freeing enslaved people in the rebellious states.
Source: https://vmfa.museum/connect/anniversary-of-antietam/#4upvt4PitYsG86HC.99
Re-evaluate the Art
Judgement: How did your perspective of the photograph change or shift after learning the artist’s perspective and more about the memory she is conjuring? After learning more about the site photographed, what questions would you like to ask the photographer?
ALTERNATE ASSIGNMENT: For students that have time to extend their learning, critique one or more of the following images.
VMFA’s Civil War Collection: https://vmfa.museum/connect/category/civil-war/
Sally Mann’s Battlefields: http://sallymann.com/selected-works/battlefields
Further Reading:
New York Times - Art In Review: Sally Mann’s Last Measure Series
National Park Service: Antietam: The Bloodiest One Day Battle in American History
National Park Service: hotography at Antietam
Historic Photographs Taken by Alexander Gardner at Antietam National Battlefield
Library of Congress: Civil War Glass Negatives and Related Prints
NPR: Antietam - A Savage Day in American History
CivilWar.org: Animated Map of Antietam
What role does memory play in history?
· What is history?
· What is a collective memory?
· How do cultures share their collective histories?
· How can people who experience specific events remember them differently?
· What is an archive?
· What role does photography play in archiving the past?
· Can we trust an image?
· How do historians distinguish between true or false narratives of the past?
“What do and should Americans remember from the nation’s past as the defining experiences that shape our present?” – David Thelan: Memory and American History,1989
PRIMARY SOURCES: In the study of history as an academic discipline, a primary source (also called original source or evidence) is an artifact, a document, diary, manuscript, autobiography, a recording, or other source of information that was created at the time under study. (A secondary source is an interpretation of a primary source)
When evaluating primary or secondary sources, the following questions might be asked to help ascertain the nature and value of material being considered:
- How does the author know these details (names, dates, times)? Was the author present at the event or soon on the scene?
- Where does this information come from—personal experience, eyewitness accounts, or reports written by others?
- Are the author's conclusions based on a single piece of evidence, or have many sources been taken into account (e.g., diary entries, along with third-party eyewitness accounts, impressions of contemporaries, newspaper accounts)?
Begin your search NOW!
HISTORIC RESEARCH LINKS: (You must find a primary source - either physical or digital evidence of a past event)
Hanover County Historical Markers
Hanover County Historic Sites
National Historic Landmarks in Virginia
Search the Virginia Historical Society collections
Virginia History Explorer - Search by Category
Virginia Historical Society Papers: Family Search
Library of Congress: Prints and Photographs
Library of Congress: American Memory Project
Richmond Times Dispatch Genealogy Bank: Search Newspaper Archives
Library of Virginia Document Bank
Virginia Memory: Multiple Exposure - Catalog of Prints and Photographs @ the Library of Virginia
National Park Service: Virginia
Digital State Archives: Virginia
Family History Center: Richmond, VA
Our Family Tree: Collaborating to Connect Family to History
LIFE: Photography Archive
RESEARCH AND PLANNING DOCUMENT (On Google Drive rename last year's folder to "A4 + Last Name" and place all contents inside a "Photo I" folder, then create a new folder titled "Photo II" - Inside create a new Google Doc titled "Memoryscape and include the information outlined below
Visual Qualities: subject matter, compositional techniques, photo manipulations - sketch, photograph, and upload using camera phone)
Conceptual Qualities: description of memories, events, people, and places of interest - explain your purpose for choosing this direction
Historical Context: provide research w/ citations - include primary source material (save documents/images online or scan and upload)
Week 9
EXHIBITION TEXT
Artist Name: (Bold)
Artwork Title, Year completed: (Italics)
Medium: Gelatin Silver Prints
(cut and paste this portion in the bottom corner of the display)
Primary Source Description: (50 word count - Use complete sentences - cut and paste this below your printed source)
Memoryscape Description:
This artist statement is a written description of your work, which will give your audience a deeper insight into it. There are three main elements to consider: the “how,” the “what,” and the “why.” There should be enough information in your artist statement that someone can begin to imagine the art that you make without having it in front of them. The statement should address the memory you were trying to convey, how you conveyed it, and for what purpose. You may include your personal history, any symbolism you gave your materials, and your overall process in creating the work. Use the information you outlined in your research/planning document. What were the visual and conceptual qualities you used to communicate your message? Provide historical context for your audience to understand the bigger picture as well. (150 word count - print and place at the top of your display)
Artist Name: (Bold)
Artwork Title, Year completed: (Italics)
Medium: Gelatin Silver Prints
(cut and paste this portion in the bottom corner of the display)
Primary Source Description: (50 word count - Use complete sentences - cut and paste this below your printed source)
- Who created it?
- How was it made?
- When was it created?
- Where was it created?
- Why do you think the author created it?
- Who was is the intended audience of the artifact at the time it was made?
- Where did you find the artifact? Who has access to the artifact now?
Memoryscape Description:
This artist statement is a written description of your work, which will give your audience a deeper insight into it. There are three main elements to consider: the “how,” the “what,” and the “why.” There should be enough information in your artist statement that someone can begin to imagine the art that you make without having it in front of them. The statement should address the memory you were trying to convey, how you conveyed it, and for what purpose. You may include your personal history, any symbolism you gave your materials, and your overall process in creating the work. Use the information you outlined in your research/planning document. What were the visual and conceptual qualities you used to communicate your message? Provide historical context for your audience to understand the bigger picture as well. (150 word count - print and place at the top of your display)
