Week 1-5
|
Hand Tinting Requirements:
|
Week 7
|
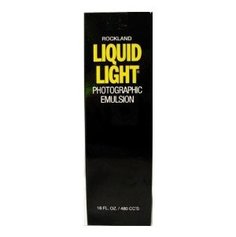
Liquid Emulsion:
This is a silver-based sensitizer for applying on any surface, exposing by an enlarger, and processing in conventional chemistry. It is virtually the same emulsion found on ordinary photographic paper, but in a liquid form and can allow the emulsion to be coated on a wide range of surfaces. Speed and Contrast: When freshly-made, liquid light is relatively slow and lacks full contrast. As it ages, it becomes faster and more contrasty. You can obtain maximum speed and contrast at any stages by adding a small quantity of working developer to the emulsion, as described below. The emulsion can leave black stains on working surfaces and needs to cleaned up immediately. |
STEP 1: Safe Light
Use safelight while coating but when emulsion is drying and for storage total darkness is recommended.
At room temperature, liquid light is a solid gel and before use the bottle must be soaked in a container of hot water until it becomes a liquid at about 110 Deg F. It is not necessary to melt the entire contents if only a portion is to be used as the mixture is of a similar consistency throughout and in fact shaking the bottle will cause bubbles to form which can effect the application of the emulsion.
STEP 2: Increasing density and sensitivity
A small, precisely-measured amount of paper developer added to liquid light just before use will give maximum speed and contrast. Add exactly one part of working developer to 10 parts of liquid light. Example: Add 15ml of dektol diluted 1:2 (Not stock or concentrated solution, but what is prepared in the paper developing trays) to 150ml of liquid light. Mix well, and coat this mixture during the same day. (Once coated and dried, material can be stored of an indefinite period).
STEP 3: Applying liquid emulsion
Use a brush, small sponge or a nap type paint applicator, by using a paint roller, spray gun, or by flowing on the emulsion and draining off the excess. At the same time, coat a few pieces of paper or file cards with the same mixture to serve as test strips to calculate the correct exposure. Like paint, too thin a coating of liquid light will show streaks and brush stokes. If an even coating is required, two thin coats will cover better than one and the second can be applied after the first has become tacky or dried. As you are applying the solution, remember to keep the emulsion warm in a water bath as it will begin to set again if it becomes cool.
STEP 4: Exposure
Liquid light can be exposed once it is dry by using an enlarger, contact printing, or by a slide projector. Liquid light is slower than normal enlargement papers and requires a longer exposure time. Suggested exposure for an 8×10 from a 35mm neg enlarged full frame is about 20sec @ f5.6 (2 stops down from the widest opening)
STEP 5: Processing liquid emulsion – development
For preparations on paper, develop like a normal print in a tray, or for other surfaces paint the developer on with a brush or sponge. A developer like Dektol diluted 1 part with 2 parts water. It is important that while the temperature of the developer is warm it is not above 70 deg F or 21 deg C. to avoid melting of the emulsion.
STEP 6: Fixing
Do not rinse with water or use a stop bath after developing. Use two consecutive identical hardening fixer baths. The first acts as a short stop; immerse for a few seconds to neutralize the developer. Next place in the second bath for 10 min or more until the chalky white pigment disappears, leaving the highlights completely transparent. (The second fixer should always be new and some agitation should be used).
STEP 7: Washing
Wash in the normal manner for at least 10 min in running water.
Source: http://www.alternativephotography.com/wp/processes/liquid-emulsion/the-liquid-emulsion-process
Week 8
TUE 5/31 - Liquid Emulsion Assignment Due - Turn in three completed prints (no images can be repeated on the same material - you should therefore have 2 or more images and/or materials with which you experimented) - Scan all three prints - manipulate in Photoshop as desired.
THU 6/2 - DUE TODAY: Scan your hand tinting print (1) and Liquid Emulsion Prints (3) and place all 4 in a folder titled "Alternative Processes" inside a "4th Nine Weeks" folder on your Google Drive. Also create folders titled "Silver Gelatin Prints," "Digital Images," and "Photoshop Composites"
Begin building your Student Portfolio websites using http://students.weebly.com - username & password = FirstLastNameStudent# (no spaces). These will remain active for one year. I highly encourage you generate a new portfolio site beyond the classroom somewhere down the line...and send me a link! If you have one already, please share and I will post it here.
40 Great Photography Portfolio Sites
FACULTY PORTFOLIO SITES:
Mr. Leise - specialdayphoto.com
Mrs. Fairburn - mchasenarratives.com
Mrs. Fisher - fisherimages.weebly.com
Mr. Leise - specialdayphoto.com
Mrs. Fairburn - mchasenarratives.com
Mrs. Fisher - fisherimages.weebly.com
STUDENT PORTFOLIO SITES:
Jasmine Brooks
Megan Brooks
Sydney Claud
Joel Collins
Meaghan Comer
Claire Congelosi
Kieran Fraser
Alli Kepley
Keeley Lawlor
Jessica Michaels
Shelby Morton
Alexis Neese
Ryan Reutti
Lauren Richardson
Jessica Roberson
Max Swanson
Samantha Waldman
Rachel Wells
Laney Williams
Jasmine Brooks
Megan Brooks
Sydney Claud
Joel Collins
Meaghan Comer
Claire Congelosi
Kieran Fraser
Alli Kepley
Keeley Lawlor
Jessica Michaels
Shelby Morton
Alexis Neese
Ryan Reutti
Lauren Richardson
Jessica Roberson
Max Swanson
Samantha Waldman
Rachel Wells
Laney Williams
Week 9
MON 6/6 - Home Page & Resume Page Complete
WED 6/8 - Portfolio Page Complete (see requirements above)
FRI 6/10 - Artist Statement Outline
WED 6/8 - Portfolio Page Complete (see requirements above)
FRI 6/10 - Artist Statement Outline
Website Requirements
Required Pages: Home, Resume, Portfolio, Artist Statement. Additional pages are optional. DO NOT INCLUDE CONTACT INFORMATION!
Portfolio Galleries: Include Silver Gelatin Prints (4), Alternative Processes (4 - 3 liquid emulsion + 1 hand tinting), Digital Images (4), Photoshop Composites (4) + 4 of your choice to get you to a total of 20 final portfolio pieces (other options for the alternative processes can include pinhole, photogram, toning & sabattier). - Ultimately these can be organized into categories of your liking if you want to stray from these headings. Just be sure to include captions on each one that defines the process and year completed.
GRADING CRITERIA
Part I: Portfolio Website (40%)
HOME PAGE (Score_____ / 10pts)
Part II: Artist Statement (60%)
CONTENT/IDEAS (Score_____ / 5 x 4pts = _____/20pts total)
1 - Writing is extremely limited in communicating knowledge, with no central theme
2 - Writing does not clearly communicate knowledge. The reader is left with questions.
3 - Writes related, quality paragraphs, with little or no details.
4 - Writing is purposeful and focused. Piece contains some details.
5 - Writing is confident and clearly focused. It holds the reader’s attention. Relevant details enrich writing.
ORGANIZATION (Score_____ / 5 x 4pts = _____/20pts total)
1 - Writing is disorganized and underdeveloped with no transitions or closure.
2 - Writing is brief and underdeveloped with very weak transitions and closure.
3 - Writing is confused and loosely organized. Transitions are weak and closure is ineffective.
4 - Uses correct writing format. Incorporates a coherent closure.
5 - Writing includes a strong beginning, middle, and end, with clear transitions and a focused closure
WORD CHOICE & SENTENCE STRUCTURE (Score_____ / 5 x 4pts = _____/20pts total)
1 - Careless or inaccurate word choice, which obscures meaning. Frequent run-ons or fragments with no variety in sentence structure.
2 - Shows some use of varied word choice. Some run-ons or fragments and little variety in sentence structure.
3 - Uses a variety of word choice to make writing interesting. Use simple, compound, and complex sentences.
4 - Purposeful use of word choice. Frequent and varied sentence structure.
5 - Effective and engaging use of word choice. Consistent variety of sentence structure throughout.
TOTAL EXAM GRADE: PART I _____/40pts + PART II _____/60pts = 100pts
Part I: Portfolio Website (40%)
HOME PAGE (Score_____ / 10pts)
- Name (5pts)
- Introduction (5pts)
- Work Experience (2pts)
- Clubs / Organizations (2pts)
- Education (2pts)
- Skills (2pts)
- Awards/Honors (2pts)
- Silver Gelatin Prints (4 = 4pts)
- Alternative Processes (3 liquid emulsion + 1 hand tinting = 4pts)
- Digital Images (4 = 4pts)
- Photoshop Composites (4 = 4pts)
- Your choice (4 = 4pts)
Part II: Artist Statement (60%)
CONTENT/IDEAS (Score_____ / 5 x 4pts = _____/20pts total)
1 - Writing is extremely limited in communicating knowledge, with no central theme
2 - Writing does not clearly communicate knowledge. The reader is left with questions.
3 - Writes related, quality paragraphs, with little or no details.
4 - Writing is purposeful and focused. Piece contains some details.
5 - Writing is confident and clearly focused. It holds the reader’s attention. Relevant details enrich writing.
ORGANIZATION (Score_____ / 5 x 4pts = _____/20pts total)
1 - Writing is disorganized and underdeveloped with no transitions or closure.
2 - Writing is brief and underdeveloped with very weak transitions and closure.
3 - Writing is confused and loosely organized. Transitions are weak and closure is ineffective.
4 - Uses correct writing format. Incorporates a coherent closure.
5 - Writing includes a strong beginning, middle, and end, with clear transitions and a focused closure
WORD CHOICE & SENTENCE STRUCTURE (Score_____ / 5 x 4pts = _____/20pts total)
1 - Careless or inaccurate word choice, which obscures meaning. Frequent run-ons or fragments with no variety in sentence structure.
2 - Shows some use of varied word choice. Some run-ons or fragments and little variety in sentence structure.
3 - Uses a variety of word choice to make writing interesting. Use simple, compound, and complex sentences.
4 - Purposeful use of word choice. Frequent and varied sentence structure.
5 - Effective and engaging use of word choice. Consistent variety of sentence structure throughout.
TOTAL EXAM GRADE: PART I _____/40pts + PART II _____/60pts = 100pts
Final Exam
TUE 6/14 - Artist Statement Page Complete
THIRD NINE WEEKS
Week 1
Due Dates:
30 exposures due by Monday, February 8th. Edit first round of photos and setup Triptych.
30 exposures due by Friday, February 12th. Edit and add to Triptych.
30 exposures due by Monday, February 8th. Edit first round of photos and setup Triptych.
30 exposures due by Friday, February 12th. Edit and add to Triptych.
Week 2
Due Dates:
30 exposures due by Wednesday, February 17th. Edit and add to Triptych.
MOTION GRADING RUBRIC:
A. CONTENT - all that is contained or expressed (25pts)
Design Requirements: 3 or more images demonstrating a range of motion photography techniques
B. COMPOSITION - purposeful arrangement of the elements/principles (25pts)
Design Requirements: Both the individual images and the final layout are carefully considered
C. CRAFTSMANSHIP - made with skill, handling of the medium (25pts)
Media Requirements: successfully utilizes shutter speeds to capture motion, and Photoshop tools to bring together multiple images
D. CREATIVITY - inventive, original, distinctive, individual style (25pts)
Conceptual Requirements: Able to capture a cohesive set of images and pull them together into a unique display
Today's Focus will be on DESIGN:
Experiment with several layouts including equal weight, and equal spacing among your 3 or more photos. Also try unequal balance. Work with colored backgrounds, borders, and/or text (use the eyedropper tool to grab straight from your photos).
Tips for Designing with multiple photos
Creative Layout Ideas
Week 3
Final TO PRINT file ready by Tuesday, February 23rd. Save to your Google Drive for grading and printing
Final Critique (for both IMAGES and LAYOUTS!) on Thursday, February 25th.
Final Critique (for both IMAGES and LAYOUTS!) on Thursday, February 25th.
|
Motion Assignment Objectives:
|
|
|
|
|
|
|
|
|
Due Dates:
- 30 exposures due by Monday, February 8th. Edit first round of photos and setup Triptych. (Week 1)
- 30 exposures due by Friday, February 12th. Edit and add to Triptych. (Week 1)
- 30 exposures due by Wednesday, February 17th. Edit and add to Triptych. (Week 2)
- Final Triptych Print due Tuesday, February 23rd. (Week 3)
- Final Critique on Thursday, February 25th. (Week 3)
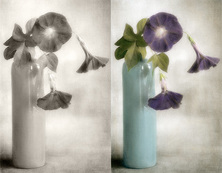
High Key / Low Key - Lighting Challenge
When light is exaggerated to the bright end of the spectrum it is called "high key" photography. When it is pushed to the dark end of the spectrum it is called "low key" photography. Your goal for this assignment will be to experiment with dramatic lighting in order to control the way your audience will interpret the meaning of your photographs. This is an opportunity for you to practice using alternative lighting situations, such as light sources other than the sun (lamps, flashlights, headlights, flams, phones, tv screens...etc). You should void using the built-in flash attached to your camera. Search for times of day, such as dusk or dawn, with hard directional lighting effects that create dramatic focal points and enhances the visual impact of your subject matter. You can expand your practices with light painting and shadow play.
HIGH KEY - To create a high key image you need to set your higher exposure values. You will want to watch out, though not to over expose. There is noticeable lack of contrast with a greater range of bright tones. There is also a lack of shadows in the picture. The shadows cast by the model (or subject) are suppressed by lighting in the scene. High key photography is often used to portray a delicate or feminine intention. A white on white photograph brings to mind the innocence of youth and the fabric of dreams.
LOW KEY - In Low Key images the tone is darker, and the controlling color is usually black. There will be lots of dark areas in the picture. It is very common for Low Key images to give special attention to contour lines, emphasizing them with highlights. There is a great deal of contrast between dark shapes and bright edges. The overall feeling will be much more mysterious than a high key photograph. In low key photography you will evoke feelings of mystery, night and secrets. In low key photography silhouette and shape prevail over color and light.
Both High Key images and Low Key images make an intensive use of contrast, but in a very different way. When approaching a shoot of a dramatic portrait, the decision of making it a High Key, Low Key or “just” a regular image has great impact about the mood that this picture will convey. While High Key images are considered happy , while Low Key portraits are dramatic and convey a lot of atmosphere and tension.
DOCUMENT EXAMPLES OF HIGH KEY AND LOW KEY LIGHTING USED TO CONVEY MOOD - Before even taking any pictures, carefully examine your surroundings to find ways in which lighting is used to manipulate our emotions. Try to make some good use of your TV watching or internet surfing time; look at the ads, try and see which one are high key and which ones low key. Try and analyze them in terms of darkness/brightness, shadows, background, and lighting. Find examples in TV shows or movies as well. How do certain websites utilize contrast and lighting to manipulate our emotions? Start hunting for artists using both high key and low key photography. Document your findings on a new Google Doc. Choose your top 3 examples to write out individual reflections: How did the photographer make use of lighting? Why do you feel they are so interesting? Describe each in detail and provide specific explanations/evidence to back up your statements about how lighting affects the mood of each image.
START BY PLANNING YOUR SUBJECT MATTER AND INTENDED MEANING AND MAKE ARRANGEMENTS FOR PHOTO SHOOTS
THEN, BEGIN CAPTURING BOTH EXAMPLES OF HIGH KEY AND LOW KEY LIGHTING
Things to Consider:
Set up your still life with meaningful items to tell a story.
Back Lighting
Directional Lighting
Bokeh Technique
Flagging and Feathering with Studio Lights
DOCUMENT EXAMPLES OF HIGH KEY AND LOW KEY LIGHTING USED TO CONVEY MOOD - Before even taking any pictures, carefully examine your surroundings to find ways in which lighting is used to manipulate our emotions. Try to make some good use of your TV watching or internet surfing time; look at the ads, try and see which one are high key and which ones low key. Try and analyze them in terms of darkness/brightness, shadows, background, and lighting. Find examples in TV shows or movies as well. How do certain websites utilize contrast and lighting to manipulate our emotions? Start hunting for artists using both high key and low key photography. Document your findings on a new Google Doc. Choose your top 3 examples to write out individual reflections: How did the photographer make use of lighting? Why do you feel they are so interesting? Describe each in detail and provide specific explanations/evidence to back up your statements about how lighting affects the mood of each image.
START BY PLANNING YOUR SUBJECT MATTER AND INTENDED MEANING AND MAKE ARRANGEMENTS FOR PHOTO SHOOTS
THEN, BEGIN CAPTURING BOTH EXAMPLES OF HIGH KEY AND LOW KEY LIGHTING
Things to Consider:
Set up your still life with meaningful items to tell a story.
- Choose contrasting shapes, values, and textures to add interest.
- Find suitable materials for draping so your items will stand out from the background.
- Use plenty of strong light sources to shoot at a shutter speed faster than 60 and prevent camera shake. Use a tripod if necessary.
- Search for unique settings with dramatic lighting effects.
- Think about what your subject can be holding, the expression on his or her face, and even what he or she is wearing to provide meaning.
- Again, use contrasting shapes, values, and textures to add interest.
- Check your shutter speed and use a tripod if below 60.
- Experiment with back lighting and silhouettes.
- Use long exposures ONLY if it enhances the subject matter and does not take away from it.
Back Lighting
Directional Lighting
Bokeh Technique
Flagging and Feathering with Studio Lights
Week 4
MON 2/29 - Finish Motion Assignment Critique - Review High Key vs Low Key
WED 3/2 - First set of 30 or more images DUE TODAY - Download & Manipulate in Photoshop
HW - Last set of 30 or more images due next Tuesday
FRI 3/4 - Creative Writing Challenge
Go to a classmate's computer across the room (do not sit close to your own computer)
With the blank sheet of paper, you will have 15 minutes to write out a narrative for each image
On Side 1: Provide an Image Title at the top of the page, then choose one or more prompts to help you begin your storyline
Continue writing the entire time, filling the page if possible - when the buzzer rings, flip the paper over
On Side 2: Provide an Image Title at the top of the page, then choose one or more prompts to help you begin your storyline
Continue writing the entire time, filling the page if possible - when the buzzer rings, flip the paper back over and return to your seat
Writing Prompts:
- Does the picture remind you of anything you have ever experienced or dreamed? What emotions are you are feeling as you're reminiscing?
- If you were living in the picture and could look all around you, what would you see? What would you smell? What would you hear? How would you feel?
- What happened five minutes before this scene, what is happening now, and what happens five minutes later? How do you know?
- Identify characters and their motives. Who are they and what do they want? Introduce dialogue into your story. What are they saying?
- Write from the perspective of one of the characters in the image. Explain who is the protagonist and antagonist. What is their conflict? Include details that are just outside of the image, the ones we can’t see.
Week 5
TUE 3/8 - Final 30 images Due today - Upload to Google Drive in your "Lighting Folder" - Sort into "High Key" and "Low Key" folders
THU 3/10 - Final Light Assignment Requirements
RULE OF THIRDS CREATIVE CHALLENGE: Using 3 High Key and 3 Low Key Images you must create 3 separate page layouts
CRITIQUE - WED 3/16
THU 3/10 - Final Light Assignment Requirements
RULE OF THIRDS CREATIVE CHALLENGE: Using 3 High Key and 3 Low Key Images you must create 3 separate page layouts
- 1 must include a narrative to correspond with the imagery on the layout - you have the option to swap this writing task with a partner (they write about your image and you write about theirs - be sure the give the author credit) - include a title and all visual elements must work together in the final layout
- 1 must be a digital composite with one or more images working together to form a new composition - utilize what you have learned about masking and blending modes - remember to keep your focus on the mood you are trying to create, and how your viewer will interpret your visuals
- 1 layout can be composed to your liking
CRITIQUE - WED 3/16
Week 6
MON 3/14 - RULE OF THIRDS CREATIVE CHALLENGE DUE
WED 3/16 - COMPLETE 3 FINAL LAYOUTS: Save PSD's as JPEG's and drop one layout per slide and then on the last slide, put all three together with a title below each one.
FRI 3/18 - CRITIQUE: Choose a partner - Create a Venn Diagram - Insert Your Name and Title = Artist Name - You will compare and contrast their three artworks - You will need to add the third circle and change the labels to match the title of each work - Add items as bullet points, but include extended description of each point - Include aspects of DESIGN (Analysis of Elements and Principles) and CONCEPT (Overall Interpretation) - Click "Share Final" and send to [email protected]!
HOMEWORK: Bring 2 film cassettes to roll film! - We will be back in the darkroom after break :)
SATURDAY 3/19 - IB ART SHOW AT THE HANOVER ARTS & ACTIVITIES CENTER, 3-5pm!!
Week 7
TUE - Submit Venn Diagram Critique - Run through it to be best prepared for the final critique
Complete Hand Tinting Questions on a new Google Doc
Roll two rolls of 100 speed film for hand tinting - making 11x14 fiber-based enlargements for Hand Tinting
THU - CRITIQUE Final Layouts - You will present your partner's works by walking us through each one's unique qualities (individual shapes on the venn diagram), then we we will view them together so you can compare them (overlapping shapes on the venn diagram)
HOMEWORK - 2 rolls of film DUE MONDAY after break
Click Here to Download Hand Tinting Document! - Drop this in your Google Drive, Third Nine Weeks, Hand Tinting folder
SPRING BREAK
Week 8/9
SECOND NINE WEEKS
Week 1
TUE 11/10
2 Rolls of Film Due - OH NO, RESHOOT!!!!
Continue Working on Digital Restoration
Scan Images Optional
THU 11/12
Develop film ON MONDAY
Intro to Studio Lighting
Scan Images Optional
Continue Working on Digital Restoration - FINAL DEADLINE: At least 3 turned into Google Drive Folder
Sign-up for Studio Session (3 Group of 5, 1 Group of 4)
Week 2
MON 11/16
Develop 2 rolls of film - Make 2 contact sheets - Get these checked off!
Get passes for Studio models (B3 Study Hall or TA ONLY)
WED 11/18- Developing our new images
Before Lunch:
Develop 2 rolls of film - Make 2 contact sheets - Get these checked off!
Get passes for Studio models (B3 Study Hall or TA ONLY)
WED 11/18- Developing our new images
Before Lunch:
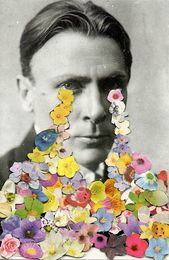
- Introduction to artist- Jo Hedwig Teeuwisse: The Dutch historian blends the past and present using photos from World War II and pictures from the same places today. While attending a flea market, Jo came across the 300 old negatives depicting familiar places in her city. As she tried to locate the exact location of each of the images it set the project in motion. “I try to make people realize that history is all around us. That where you live, work or go to school, once people fought, died or simply experienced a different kind of life. We are history, history is us,” – she says.
Studio Lighting Session 1 (Before Lunch) - 1st Group: 2 Contact Sheets, Digital images into Google Drive DUE
Studio Lighting Session 2 (After Lunch) - 2nd Group: 2 Contact Sheets, Digital images into Google Drive DUE
Darkroom Session - 2 Contact sheets, 1 Enlarged Print DUE
FRI 11/20
Studio Lighting Session 3 (Before Lunch) - 3rd Group of 5
Studio Lighting Session 4 (After Lunch) - 4th Group of 4
Darkroom Session - Work on 3-5 Enlargements
Scanning Session - Save Finished Prints in Google Drive
Week 3
TUE 11/24
Work on final Montages (3-5 required)
Work on final Montages (3-5 required)
Week 4
TUE 12/1 - Work on final Montages (3-5 required)
THU 12/3 - DEADLINE FOR FINAL MONTAGES
THU 12/3 - DEADLINE FOR FINAL MONTAGES
Week 5
MON 12/7 - Complete final montages
WED 12/9
Before Lunch: SAVE 3 FINAL MONTAGES as a TIFF in your Google Drive (also, save a JPEG version to be placed on your final critique slides)
Create a New Google Slide - Insert one image per slide
After lunch: Shannon Castleman, VCU Professor (Guest Speaker 1:00-1:50)
FRI 12/11 - Montage Critique
Week 6
TUE 12/15 - Finish Montage Critiques - Introduce Next Assignment
PHOTOGRAPHY CAREER PROJECT
|
SLIDE PRESENTATION: The purpose of this assignment is to allow you to align your current interests and expertise with a possible career in photography. This assignment is going to help you gain important resume building skills while also allowing you to expand your understanding of the photographic profession. You will be preparing slides that will act as a mock application for your photography career choice. You will set the date to four or five years from now (based on your high school graduation date). This way you will be applying with the educational or work experience necessary to achieve your desired position. All the information in your slides must be real, though of course this is a hypothetical assignment. Direct your research in finding actual positions and opportunities available in the location of your choice (one which you are seriously considering for your future). The jobs do not have to be currently available, but they do have to exist.
SHOOTING ASSIGNMENT: You will ultimately be producing a portfolio of images that will allow you to compete for the position of your choice. |

|
DEADLINES: TWO ROLLS OF FILM WILL BE DUE THE WEEK YOU RETURN FROM BREAK (Week 7)
You will present your slides with you final images during Week 9
So let's get started! To begin...
Create a new Google Doc titled: Photography Career Project Planning
You will present your slides with you final images during Week 9
So let's get started! To begin...
Create a new Google Doc titled: Photography Career Project Planning
|
Career Profile: Begin your research by choosing one of the careers listed below as your focus. Feel free to offer suggestions for additional careers not listed below. You will need to find descriptions and examples of professional work within your chosen career. Be sure to document your research and sources.
PHOTOGRAPHY CAREER CHOICES:
Photography & Journalism/Media
Photojournalist (Newspapers, Magazines, Online Articles/Blogs) Director of Photography (Movies) Wedding Photographer Street Photographer Photo Editor Portrait/Family Photographer Photography & History Historical/Documentary Photographer War Photographer Photo Historian Archivist Photography & Athletics Action/Sports Photographer Photography & Music Portrait Photographer (Cover Art, Music Videos) Concert Photographer Photography & Advertising Product Photographer (Studio Still-Life) Fashion Photographer Travel Photographer Commercial/Stock Photographer Food Photographer Vehicle Photographer Real Estate/Architecture Photographer Retouch Artist |
Job Profile: Find REAL jobs that are within our area and/or other areas in which you would like to live in the future (they do not have to be hiring at the moment). Include entry level positions as well as jobs available to experts. Seek the following information for each job: Title, Company & Location, Responsibilities, Knowledge & Skills, Years Experience, Degree Requirements, Salary Range. Be sure to document your research and sources.
Photography & Science
Aerial Photographer Scientific Photographer (Anatomy, Archaeology, Astrology) Criminal Photographer Medical Photographer Nature Photographer (Animal, Botanical, Landscape) Underwater Photographer (Oceanography) Pet Photographer (Biology) Camera Technician Lighting Technician Darkroom Technician (Chemistry) Photography & Education Photography Teacher (K-12) Photography Professor (Higher Education) School Photographer Photography & Art Art Critic Illustrator Mixed Media Artist Color Restorer Museum Curator More Sources: 30 Types of Photographers - Which Are You? If Not a Photographer, Which Would You Rather Be? |
Create a new Google Slide titled: "Photography Career" Application ("insert your career choice")
Slide 1: Identification/Objective
This is the opening slide. Be sure to identify who you are. Include your full name and email address. Since we’re thinking ahead, set the current date for five years from now.
Slide 2: Career/Job Profile
State who you want to work for, what position you are interested in, and what you want to do for your dream job in the field of photography. Give a clear description of the company and highlight the specific skills, years of experience, and/or degree requirements that are necessary for this job.
Slide 3-12: Career Examples
Include 10 examples of professional work within that career (one image per slide).
Provide information on each artist including their name, who they were working for, and when they photograph was taken.
Slide 13: Work Experience (Imaginary Resume)
Find three or more positions in your area or the areas in which you would like to live. Include the name of the employer, location, position title, dates of employment, and statement of duties or accomplishments. List the most recent first (most experienced to least experienced). You must cover the years from 2016-2021.
Slide 14: Education (Imaginary Resume)
List all relevant education, training, and certifications. Include degree(s) awarded, school(s) attended, dates of attendance, along with program/major courses. List the most recent first. High School will be listed last.
Slide 15: Qualifications & Skills (Imaginary Resume)
List your own qualifications, skills, and achievements. These can be technical skills both in and outside of the darkroom. Be sure to offer your experience working with any other art materials and/or computer software.
Slide 16: Awards & Honors / Activities & Associations (Imaginary Resume)
Highlight any formal recognition you have received (professional, academic, or extra curricular). Provide the name of professional associations, clubs, or community activities in which you participate.
Slide 17: Project Glimpse
Your goal is to add work to your portfolio that BEST exemplifies your qualifications and skills in a UNIQUE way. It is a competitive world out there and you need to utilize your strengths in order to be successful. Explain the process you went through to get the very best outcome for this assignment. Include shooting requirements, all necessary materials, and anticipated results. Be sure to list the people involved as well.
Slide 18-22(-26): Photography Career Portfolio
3-5 Darkroom Prints (retouch if necessary)
3-5 Digital Images
THU 12/17 - Continue Building Career Slides - Roll Film (2 rolls due after break!)
Week 7
MON 1/4 - Develop 2 Rolls of Film
WED 1/6 - Make 2 Contacts Sheets
THU 1/7 - ART GUILD
FRI 1/8 - Make Enlargements, Scan & Upload
WED 1/6 - Make 2 Contacts Sheets
THU 1/7 - ART GUILD
FRI 1/8 - Make Enlargements, Scan & Upload
Week 8
TUE 1/12
PROGRESS FORM - Answer the following questions of a separate sheet of paper and include your name and heading
DREAM JOB: Describe the position you will be applying for with this new body of work that is currently in progress.
WHY did you choose this particular position and location?
SHOOTING ASSIGNMENT: WHERE did you shoot? WHAT was you subject? HOW did you capture it? WHY did you photograph it the way you did? HOW do you hope your audience will respond to the work? WHAT have been your results so far - failures? successes?
Be prepared to share evidence of last week's progress with the class including contact sheets and prints
You will paper clip everything to this form
HW: Roll film if you need to re-shoot. Last day to develop is next class.
THU 1/14 - Continue printing and scanning enlargements
Week 9
TUE 1/19 - ALL PRINTS DUE IN THE GOOGLE DRIVE (3-5 enlargements)
THU 1/21 - Complete Career Presentation Slides
REMINDER for Exam Block: Come prepared with 3-5 prints from last year and 3-5 prints from this year (they can be available online) and ALL film negatives from the past year and a half.
ART GUILD TODAY
THU 1/21 - Complete Career Presentation Slides
REMINDER for Exam Block: Come prepared with 3-5 prints from last year and 3-5 prints from this year (they can be available online) and ALL film negatives from the past year and a half.
ART GUILD TODAY
MIDTERM EXAM
MON 1/25 - Present and Critique
WED 1/27 - Exam Block: Come prepared with 3-5 prints from last year and 3-5 prints from this year (they can be available online) and ALL film negatives from the past year and a half.
WED 1/27 - Exam Block: Come prepared with 3-5 prints from last year and 3-5 prints from this year (they can be available online) and ALL film negatives from the past year and a half.
FIRST NINE WEEKS
Week 1
| EVERYDAY DESIGN PROJECT |
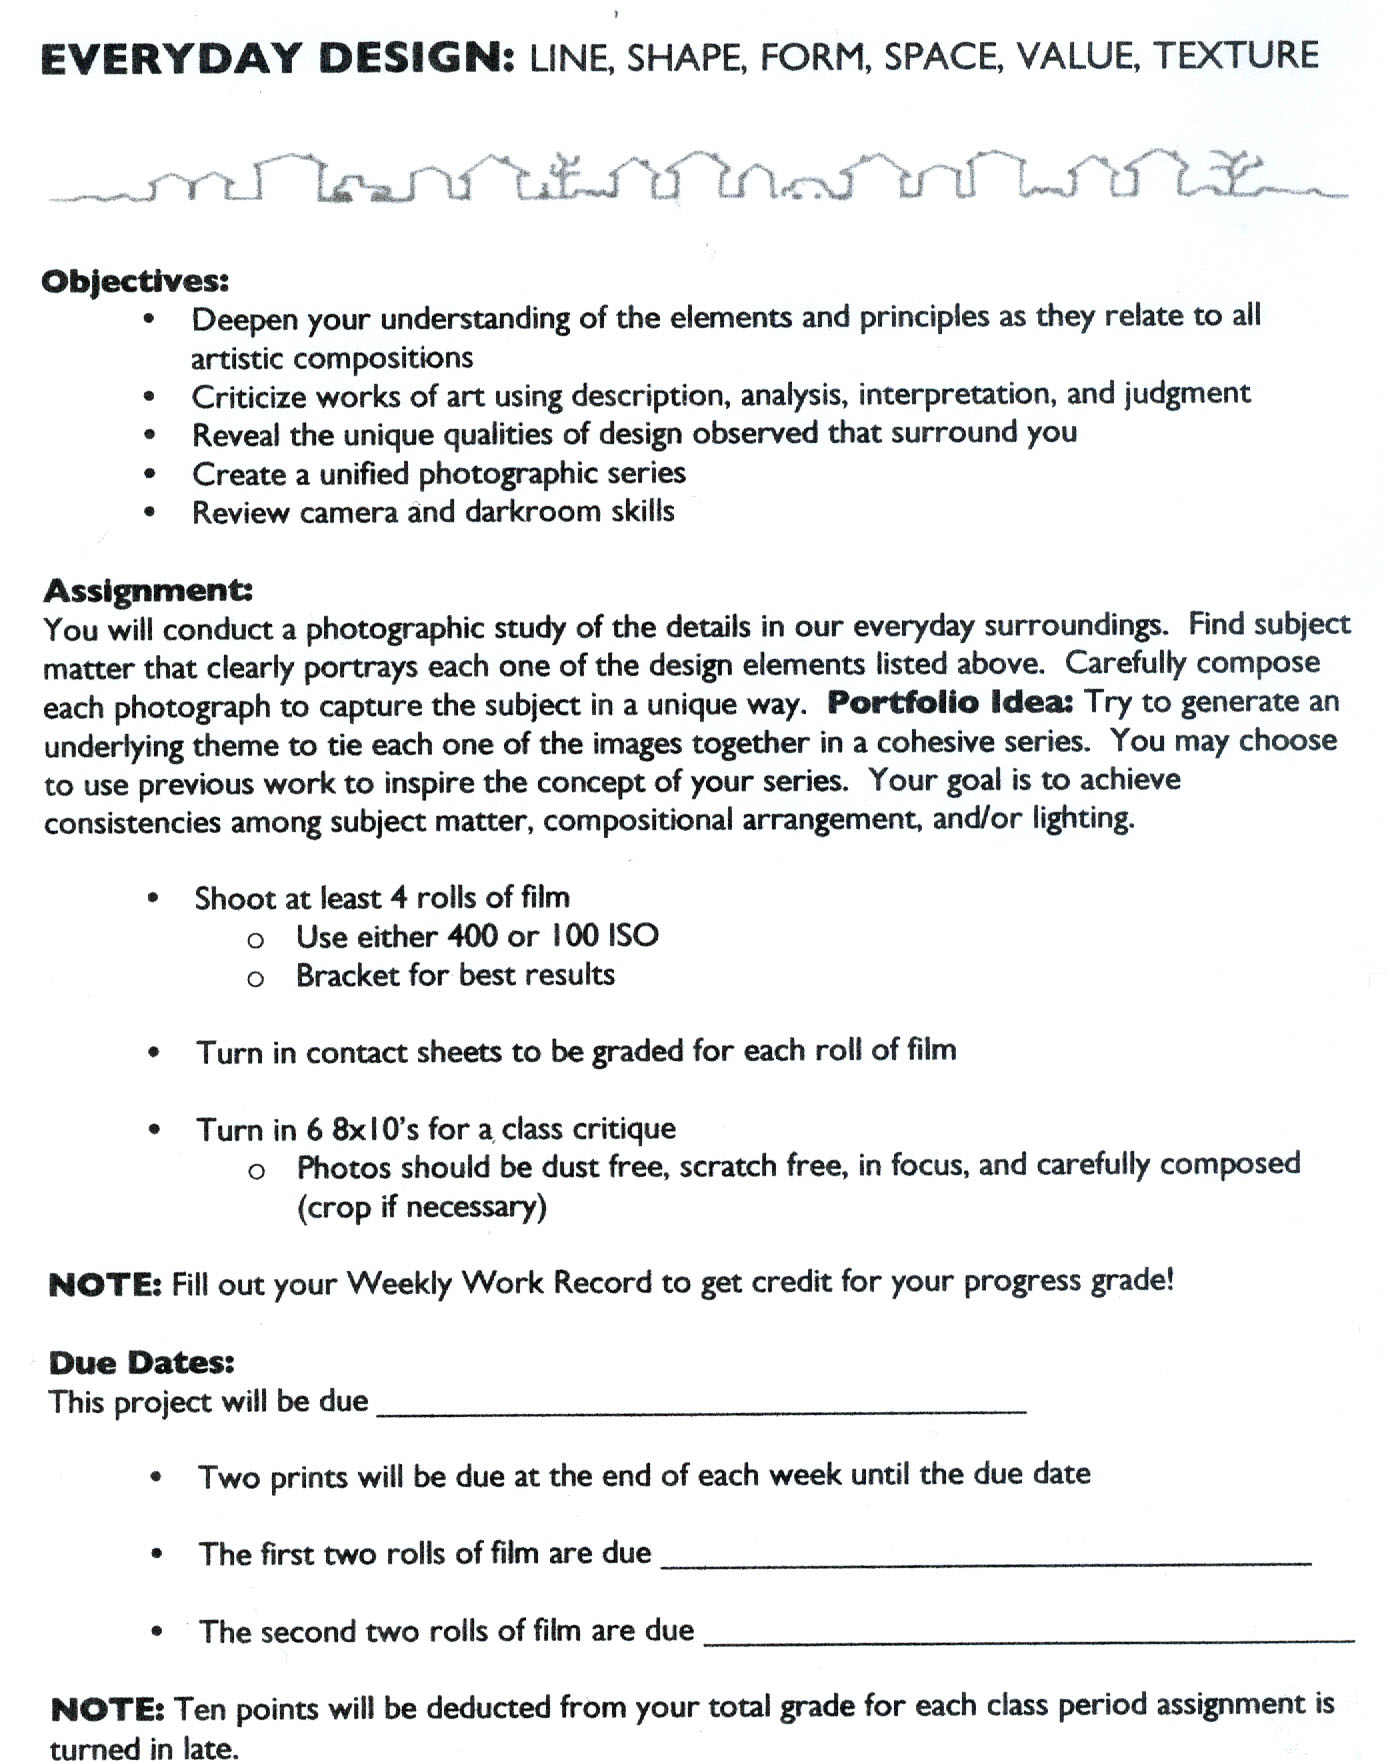
EVERYDAY DESIGN ELEMENTS: LINE, SHAPE, FORM, SPACE, VALUE, TEXTURE
WED 9/9 - EVERYDAY DESIGN Examples - Choose 1 Photographer and find 6 Connecting Image Examples - Place in Powerpoint and Save
HW DUE FRIDAY = Get Syllabus Signed, Turn in Art Guild/NAHS Dues, Bring Film Cassettes
FRI 9/11 - Load Film Cassettes, Present EVERYDAY DESIGN Examples
EVERYDAY DESIGN PRESENTATIONS
Slide 1: Start with a photographer quote (it does not have to be the same photographer as your image examples) - Read the quote and introduce yourself to the class with an explanation of how you feel connected to that particular quote
The next slides should be the absolute best examples of each design element used in a dominant and creative way. Include one image per slide and make it as large as possible without distorting it. Include the photographer's name, title of the work, date it was created, the overall size and how it was made.
Slide 2: Line
Slide 3: Shape
Slide 4: Form
Slide 5: Space
Slide 6: Value
Slide 7: Texture
Slide 8: Connections - Provide an explanation of what unites these images besides who made it. Determine what visual qualities and conceptual qualities links this photographer's portfolio.
HW DUE NEXT TUESDAY = EVERYDAY DESIGN: FIRST 2 ROLLS OF FILM
Week 2
TUE 9/15 - EVERYDAY DESIGN: Share Everyday Design Presentations & Develop 2 Rolls of Film
Alternate Assignment: Add Criticism Slide for each of the 6 Images on your Everyday Design Powerpoint - View Steps Here: Describe Analyze Interpret & Judge
Alternate Assignment: Add Criticism Slide for each of the 6 Images on your Everyday Design Powerpoint - View Steps Here: Describe Analyze Interpret & Judge
THU 9/17 EVERYDAY DESIGN: Turn in 2 Contact Sheets & Begin Enlargements
Alternate Assignment: Add Criticism Slide for each of the 6 Images on your Everyday Design Powerpoint - View Steps Here: Describe Analyze Interpret & Judge
HW DUE NEXT MONDAY = EVERYDAY DESIGN: LAST 2 ROLLS OF FILM
Week 3
MON 9/21 - EVERYDAY DESIGN: Develop 2 Rolls of Film
THU 9/24 - EVERYDAY DESIGN: Turn in all Contact Sheets - Review first round of prints - DODGING & BURNING - Turn in 2 8x10's
THU 9/24 - EVERYDAY DESIGN: Turn in all Contact Sheets - Review first round of prints - DODGING & BURNING - Turn in 2 8x10's
Week 4
MON 9/28 - EVERYDAY DESIGN: Midway Critique - 4 Contact Sheets & 2 8x10's (Enlarger Partner Swap)
WED 9/30 - EVERYDAY DESIGN: 2 More 8x10's (Enlarger Partner Swap)
FRI 10/2 - Final 2 8x10's - Scan all 6 Prints to Build Online Portfolios (Enlarger Partner Swap)
WED 9/30 - EVERYDAY DESIGN: 2 More 8x10's (Enlarger Partner Swap)
FRI 10/2 - Final 2 8x10's - Scan all 6 Prints to Build Online Portfolios (Enlarger Partner Swap)
Week 5
TUE 10/6 - Set up google accounts
www.google.com - Sign In
USERNAME = student#@hcps.us
PASSWORD = birthday (ex: 11221999)
Go to Apps - Google Drive
Create Folder Name: B3 LASTNAME
Share with [email protected] - Can edit
Create a New Google Slide titled "Everyday Design"
Slide 1 - Theme Title + Explanation
Slide 2 - LINE
Slide 3 - SHAPE
Slide 4 - FORM
Slide 5 - VALUE
Slide 6 - TEXTURE
Slide 7 - SPACE
(place the last two slides after the corresponding image)
(Slide 8) - Write a paragraph critiquing your STRONGEST image in the portfolio
(Slide 9) - Write a paragraph critiquing your WEAKEST image in the portfolio
THU 10/8
Finish Everyday Design Slides
Week 6

|
|
|
|
|
|
MON 10/12
Photoshop Tutorials:
ADJUSTMENT LAYERS - http://psd.tutsplus.com/tutorials/tools-tips/adjustment-layers-photoshop/
MASKING - http://psd.tutsplus.com/tutorials/tools-tips/masking-photoshop/
CLIPPING MASK - http://psd.tutsplus.com/tutorials/tools-tips/clipping-masks/
MAKING FAST SELECTIONS - http://psd.tutsplus.com/tutorials/tools-tips/selections/
LETS CHANGE THE BACKGROUND - http://psd.tutsplus.com/tutorials/photo-effects-tutorials/color-range/
BLENDING - http://psd.tutsplus.com/tutorials/tools-tips/blending-modes-photoshop/
(More on Making Selections, More on Adjustment Layers, More on Blending)
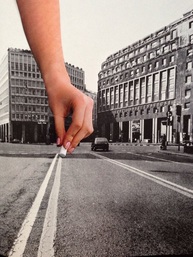
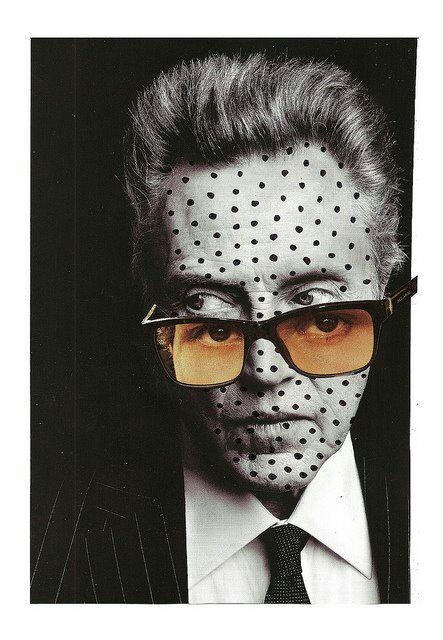
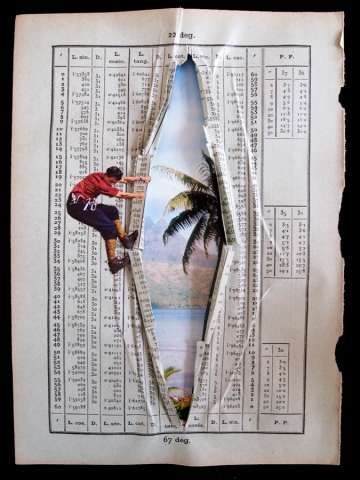
Artist Example: Collages by Merve Ozaslam
(More Digital Collage Examples)
WED 10/14
Photoshop Challenge:
Use Photoshop to alter and combine your six scanned portfolio images - you are required to utilize at least two and up to six images in order to create a total of three entirely new compositions.
You will also be adding at least one other digital element, which you must scan or photograph (select and share images on your phone to your google drive account or bring in a chord/memory card to download)
Composition #1. Use adjustment layers to alter one or more selections
Composition #2. Use masking or blending to combine one or more images
Composition #3. Include additional digital element using masking or blending (image or scan)
*You must make use of layer masks in stead of cutting and pasting your objects - REMEMBER: white reveals, black hides
*You may choose to create several varieties of compositions and then choose your top 3
FRI 10/16 - Continue working on Photoshop Tasks - Drag DIGITAL ELEMENT file into your B3 Google Drive Folder
Photoshop Tutorials:
ADJUSTMENT LAYERS - http://psd.tutsplus.com/tutorials/tools-tips/adjustment-layers-photoshop/
MASKING - http://psd.tutsplus.com/tutorials/tools-tips/masking-photoshop/
CLIPPING MASK - http://psd.tutsplus.com/tutorials/tools-tips/clipping-masks/
MAKING FAST SELECTIONS - http://psd.tutsplus.com/tutorials/tools-tips/selections/
LETS CHANGE THE BACKGROUND - http://psd.tutsplus.com/tutorials/photo-effects-tutorials/color-range/
BLENDING - http://psd.tutsplus.com/tutorials/tools-tips/blending-modes-photoshop/
(More on Making Selections, More on Adjustment Layers, More on Blending)
Artist Example: Collages by Merve Ozaslam
(More Digital Collage Examples)
WED 10/14
Photoshop Challenge:
Use Photoshop to alter and combine your six scanned portfolio images - you are required to utilize at least two and up to six images in order to create a total of three entirely new compositions.
You will also be adding at least one other digital element, which you must scan or photograph (select and share images on your phone to your google drive account or bring in a chord/memory card to download)
Composition #1. Use adjustment layers to alter one or more selections
Composition #2. Use masking or blending to combine one or more images
Composition #3. Include additional digital element using masking or blending (image or scan)
*You must make use of layer masks in stead of cutting and pasting your objects - REMEMBER: white reveals, black hides
*You may choose to create several varieties of compositions and then choose your top 3
FRI 10/16 - Continue working on Photoshop Tasks - Drag DIGITAL ELEMENT file into your B3 Google Drive Folder
Week 7
TUE 10/20 - DIGITAL ELEMENT should be in your Google Drive!
Complete all 3 Compositions and drag the Photoshop files into your B3 Google Drive Folder
THU 10/22 - Critique Final Compositions
PART I
Open 3 Final Compositions in Photoshop
File, Save As, Location = Student drive, Format = JPEG, Save, Quality =12
Create New Google Slide in B3
Slide 1 - Insert Composition 1 - Underneath, Click to Add Notes: Explain 1 Element and 1 Principle of Design
Slide 2 - Insert Composition 2 - Underneath, Click to Add Notes: Explain 1 Element and 1 Principle of Design
Slide 3 - Insert Composition 3 - Underneath, Click to Add Notes: Explain 1 Element and 1 Principle of Design
Slide 4 - Insert Compositions 1-3 Together - Underneath, Click to Add Notes: What challenges did you face while creating these compositions? What have you discovered in the process?
PART II
Switch computers with another student (not your neighbor)
Go through Slides 1-3 and add additional notes in a new color (+1 Element +1 Principle of Design for each composition)
On Slide 4, include at least one "Glow" (strength) and one "Grow" (constructive criticism) for any of the three compositions
Week 8
MON 10/26 - INTRODUCTION TO DIGITAL RESTORATION
Before lunch:
FIRST Finish PART II of Photoshop Challenge Critique
THEN Begin searching for 5-8 old photos with visible deterioration (rips, bubbling, fading, or stains)
Before lunch:
FIRST Finish PART II of Photoshop Challenge Critique
THEN Begin searching for 5-8 old photos with visible deterioration (rips, bubbling, fading, or stains)
|
INSTRUCTIONS FOR SAVING HIGH QUALITY IMAGES
|
After lunch:
Present Final Critique Slides with partner
Audience Response: "If you were a curator and could buy one of these art works, which one would it be and why?"
WED 10/26
Ryan Gothrup Glass Blowing Demonstration
Present Final Critique Slides with partner
Audience Response: "If you were a curator and could buy one of these art works, which one would it be and why?"
WED 10/26
Ryan Gothrup Glass Blowing Demonstration

Finish Critique Presentations
FRI 10/28
Introduction to Digital Restoration: Montage Presentation
Introduction to Digital Restoration: Montage Presentation
- Spot Healing Brush: corrects imperfections, causing them to disappear into the surrounding image by sampling pixels from an image or pattern. It also matches the texture, lighting, transparency, and shading of the sampled pixels to the pixels being healed. As a result, the repaired pixels blend seamlessly into the rest of the image.
- Patch Tool: an entire area can be repaired with pixels from another area. Just like the healing brush tool, the patch tool will try to correct lighting, shading, and texture. To use the patch tool, first draw a selection with any of the selection tools (or the patch tool, which will function as a lasso tool).
- Clone Stamp: allows you to duplicate part of an image. The process involves setting a sampling point in the image, which will be used as a reference to create a new cloned area.
Assignment: Begin using these new tools to digitally restore one of the photographs you found online.
- Each tool = new layer, 3 tools in 1 group.
- Do not make adjustments on locked background layer!
- Save your image as a TIFF file and drag it to your B3 folder on Google Drive
Week 9
WED 11/4
Open your Google Drive - Select your B3 folder - Share with [email protected]
Create two new folders inside your B3 folder
Open your Google Drive - Select your B3 folder - Share with [email protected]
Create two new folders inside your B3 folder
- "1st 9 Weeks" (Everyday Design + Photoshop Challenge Files)
- "2nd 9 Weeks" (Digital Restoration Files - BE SURE YOUR TIFF FILE IS SAVED HERE TO BE GRADED!)
Scanning Instructions: (For images brought from home)
Login and Double Click the HP Scanning Icon of the Desktop
Select Picture to File > Scan
Select Browse > Select you Student #
Place Image face down in the top right corner of the scanner > Scan
Crop, Rotate, and Adjust Color as needed > Finish
Replace Image > Scan
Click Done after last scan
If you did not bring an image from home, search here:
File Formats:
Roll two rolls of film for shooting over the weekend.
Login and Double Click the HP Scanning Icon of the Desktop
Select Picture to File > Scan
Select Browse > Select you Student #
Place Image face down in the top right corner of the scanner > Scan
Crop, Rotate, and Adjust Color as needed > Finish
Replace Image > Scan
Click Done after last scan
If you did not bring an image from home, search here:
- http://cargocollective.com/angelaswjangupenn/Found-Photography-Project
- http://www.vulture.com/2014/12/slideshow-people-next-to-their-televisions.html
- http://look-at-me.tumblr.com
- http://www.vulture.com/2015/05/found-photography-divers.html
- http://vintage-snapshots.com
File Formats:
- High Resolution Image: refers to the number of pixels in an image. Resolution is sometimes identified by the width and height of the image as well as the total number of pixels in the image. Ex/ an image that is 2048 pixels wide and 1536 pixels high (2048X1536) = 3,145,728 pixels
- JPEG (Joint Photographic Experts Group): created by choosing from a range of compression qualities. By choosing this file format you are losing image quality, pixels, colors, and details. Suitable format for web presence.
- TIFF (Tagged Image File Format): supports saving layered files and works in all color modes.
Roll two rolls of film for shooting over the weekend.
Homework Assignment: Consider how the images you take at home could correlate with the images you worked with today. Consider subject matter, composition, and possibly juxtaposing content. SHOOT TWO ROLLS OF FILM BY NEXT TUESDAY!
Portrait Artist Research Assignment: Choose one photographer from the list in order to do research. Begin by creating a new google doc in your B3 folder with the following information: the history of the photographer, their process, 3-5 photographs with title and date, and an explanation of how this photographer utilizes portraiture. Anything not completed in class needs to be completed at home.
|
Digital:
Irving Penn Richard Avedon Naoko Wowsugi “Thank you for Teaching Me English” Annie Leibovitz Cynthia Henebry Chang W. Lee Steven Casanova Dominique Munoz Mark Seliger Dan Winters Douglas Kirkland Carrie Mae Weems Martin Parr Jeff Wall |
Film:
Diane Arbus Dorothea Lange Irving Penn Doug Dubois Alec Soth Danny Lyon Robert Frank Gordon Parks Walker Evans Garry Winogrand Lee Friedlander Henri Cartier-Bresson Vivian Maier Helen Levitt |
