FOURTH NINE WEEKS
Week 1
(2 rolls of film were due TUE 4/5 and 2 Contact Sheets due THU 4/7)
MON 4/11 - Exposure Records + Outcomes Due
WED 4/13 - 1st and 2nd Enlargements Due
FRI 4/15 - 3rd Enlargement Due
MON 4/11 - Exposure Records + Outcomes Due
WED 4/13 - 1st and 2nd Enlargements Due
FRI 4/15 - 3rd Enlargement Due
|
ALTERNATE ASSIGNMENT:
Create a new Google Doc and begin writing about your research on role of the documentary photographers that worked for the Farm Security Administration (include sources). Choose one photographer below and add at least 3 examples of their work include it with your research. Include a caption for each with photographer's name, and a title of the work. You must provide a separate critique for each image. You can use this resource: Elements and Principles of Design Definitions FSA PHOTOGRAPHERS: Dorothea Lange, Walker Evans, Arthur Rothstein, Ben Shahn, John Vachon, Marion Post Wolcott, Russell Lee, Jack Delano, John Collier, Jr., Carl Mydans, Gordon Parks http://www.livinghistoryfarm.org/farminginthe30s/water_14.html |
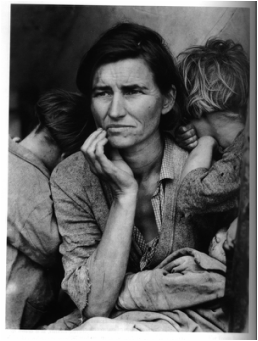
Dorothea Lange "Migrant Mother" 1935
https://rawnakedart.com/2014/09/08/100-days-of-art-day-7-dorothea-lange/ |
Week 2
TUE 4/19
Dorothea Lange Documentary
THU 4/21
Final Series Project Due Today! 4th Filtered Enlargement should be labeled with the filter number on the back
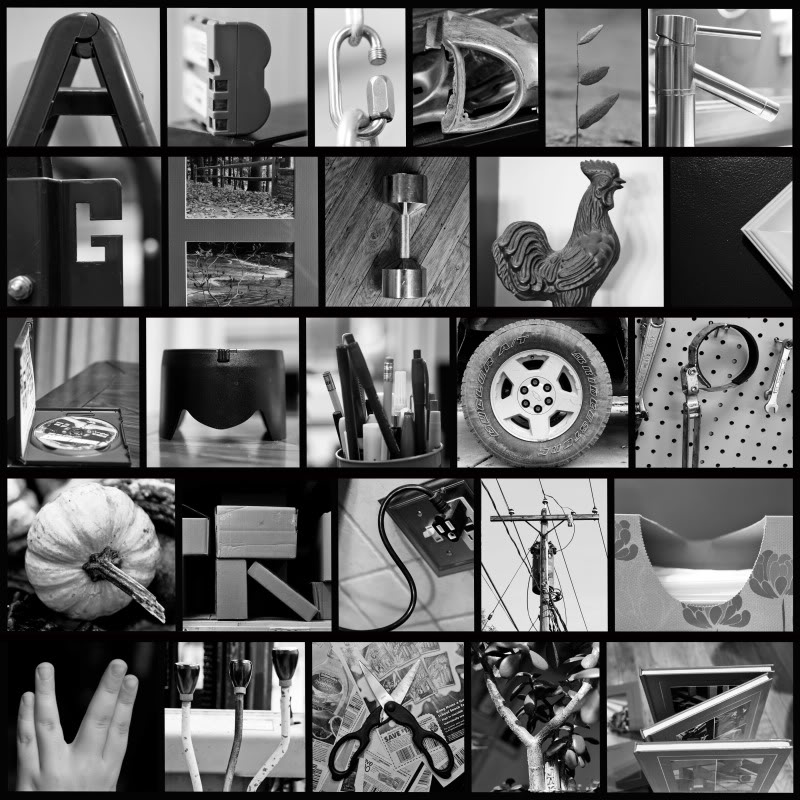
Alphabet Photography - 2 rolls of film due next Monday (2 words between 5-8 letters long)
Dorothea Lange Documentary
THU 4/21
Final Series Project Due Today! 4th Filtered Enlargement should be labeled with the filter number on the back
Alphabet Photography - 2 rolls of film due next Monday (2 words between 5-8 letters long)
Week 3
MON 4/25 - Two rolls of film due for the Alphabet Photography Assignment - Roll film to re-shoot if necessary!
WED 4/27 - Exposure Records with PROPERLY bracketed camera settings, and CORRECTLY labeled outcomes with 2 Contact Sheets
FRI 4/29 - Begin printing your word or words (5-8 letters each)
WED 4/27 - Exposure Records with PROPERLY bracketed camera settings, and CORRECTLY labeled outcomes with 2 Contact Sheets
FRI 4/29 - Begin printing your word or words (5-8 letters each)
Week 4
TUE 5/3 - Continue alphabet printing
THU 5/5 - Continue alphabet printing
THU 5/5 - Continue alphabet printing
Week 5
MON 5/0 - Continue alphabet printing
WED 5/11 - Complete final alphabet prints
HW: BRING ALL NEGATIVES AND PHOTO PAPER FRIDAY FOR YOUR NEXT PROJECT (no new film is required)
FRI 5/13
All alphabet assignments must be mounted, labeled, and pinned on the wall
Begin test strips for next assignment
The Sabattier effect is produced by re-exposing a photographic material to light part way through the development process. The print is then re-developed and a unique effect occurs in which values are reversed and subject mater appears as metallic silver with a mysterious glow around the edges (known as Mackie Lines). This process was discovered in 1857 by William L. Jackson who noticed a reversal in tones that occurred when his partially developed photographic plate was accidentally exposed to white light. Armand Sabattier published an article describing this effect in 1862, and it has since bore his name.
DOWNLOAD SABATTIER STEPS
Week 6
Complete Sabattier Project:
Sabattier Print + Contact Print REQUIRED
Contact Print w/ Sabattier EXTRA CREDIT
Sabattier Print + Contact Print REQUIRED
Contact Print w/ Sabattier EXTRA CREDIT
Week 7
MON 5/23 - Sign up for one team and category - Write out 5 exam questions utilizing the appropriate vocabulary terms listed below
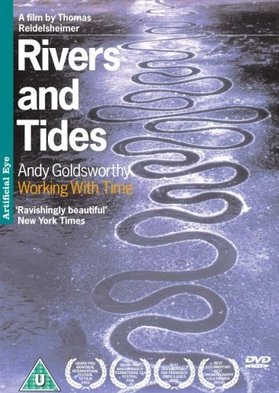
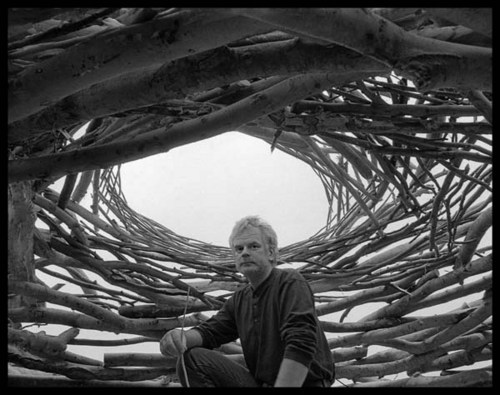
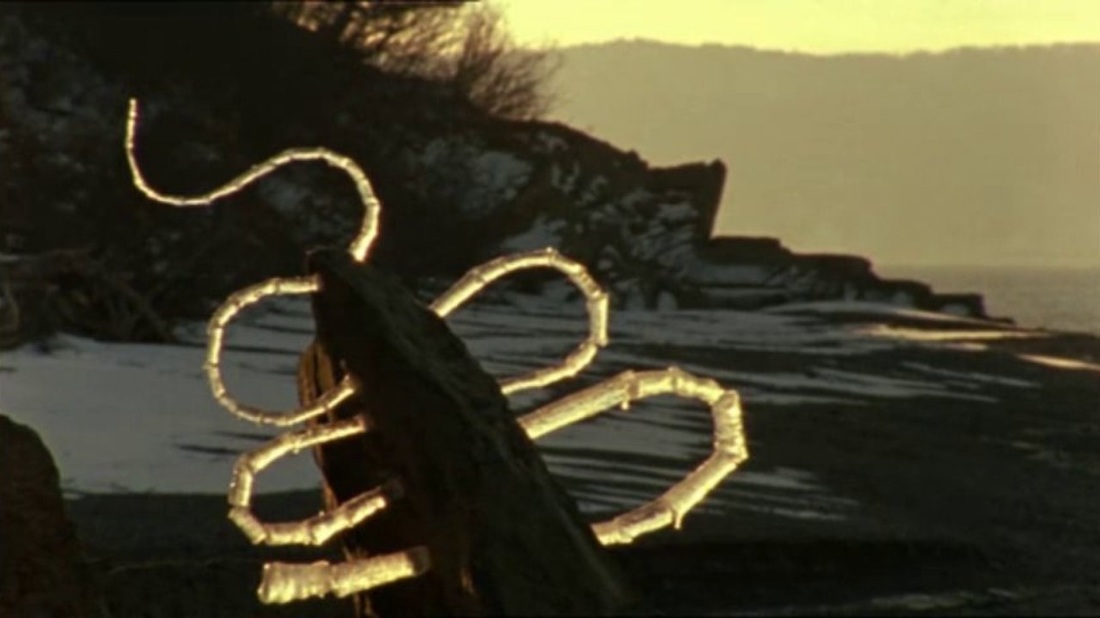
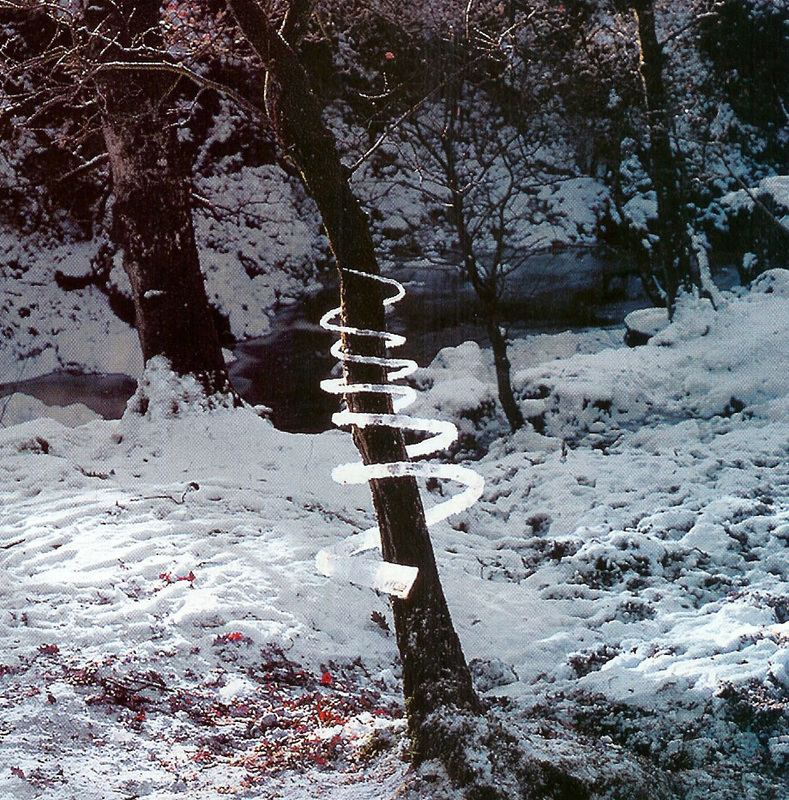
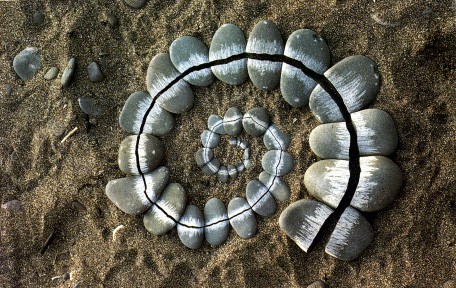
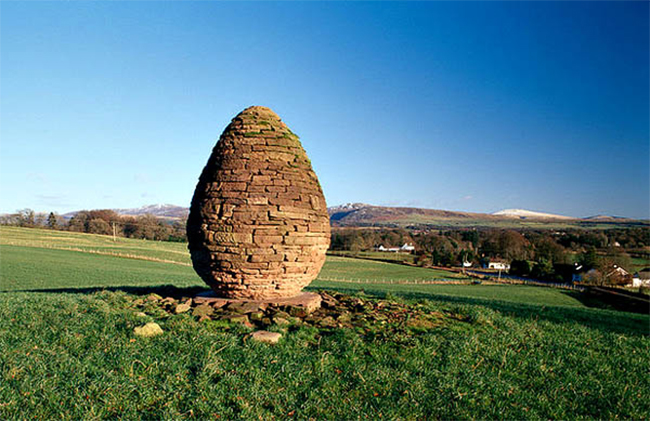
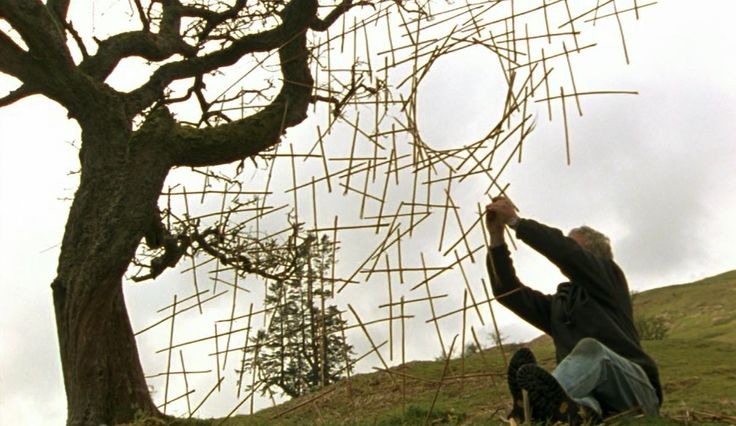
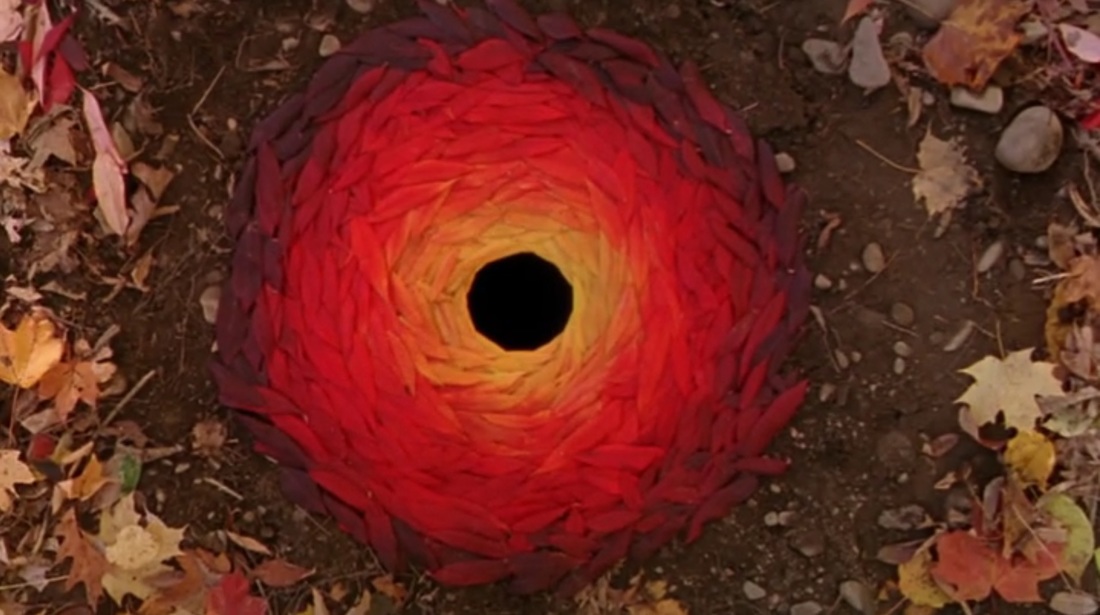
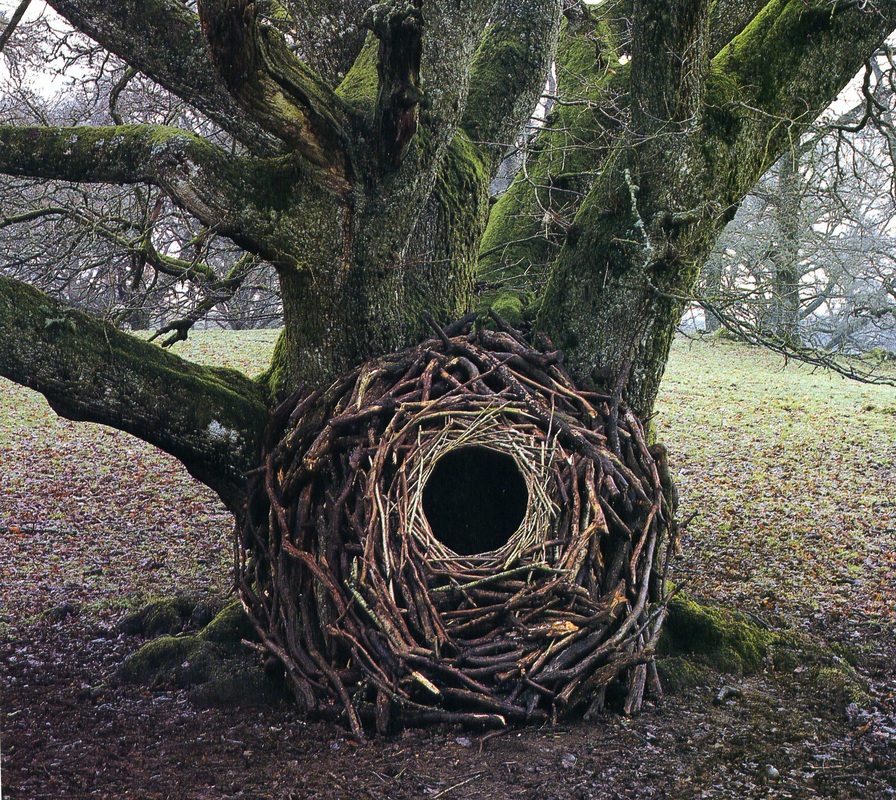
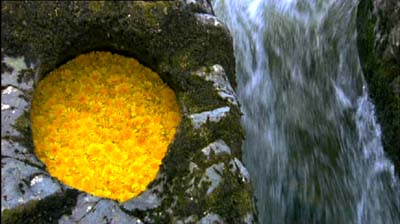
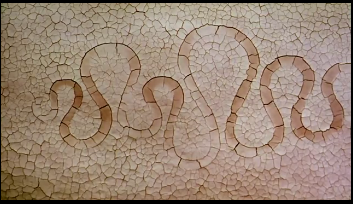
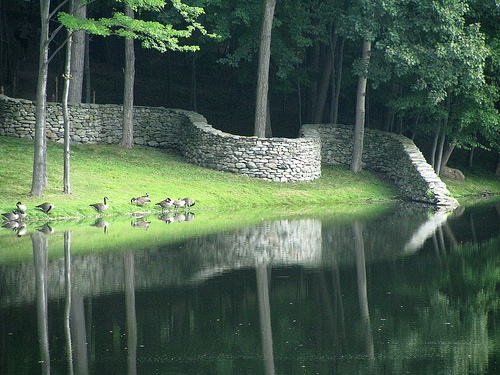
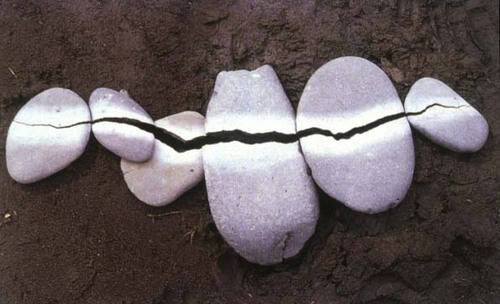
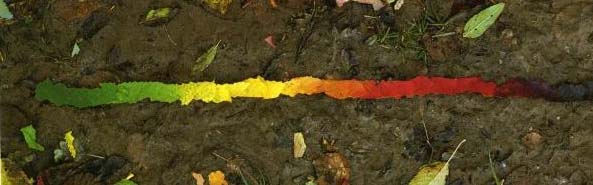
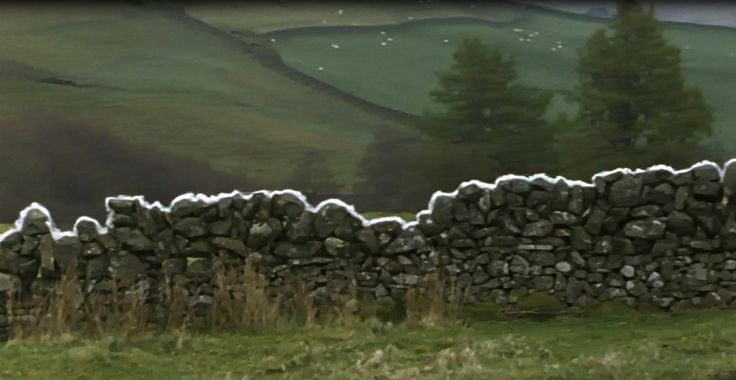
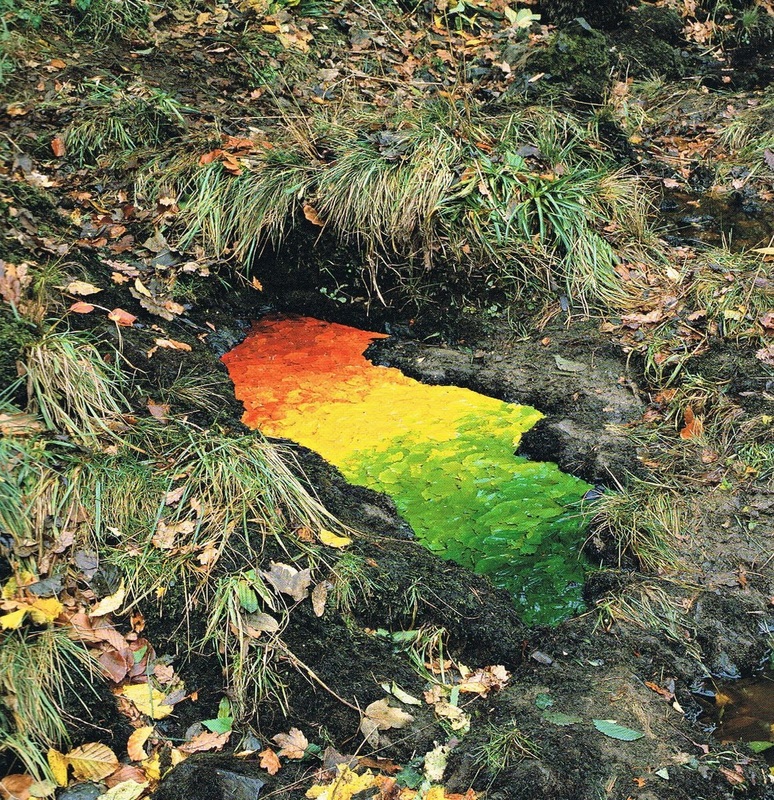
WED 5/25 - Andy Goldsworthy Video and Critique
FRI 5/27 - Andy Goldsworthy Digital Teams - We will be outside the entire block...be prepared for warm weather!
Grading Criteria: (25pts each = 100pts total)
A. Construction - How well is the environmental sculpture constructed? What is the level of difficulty?
B. Design - How does the sculpture's design create visual impact?
C. Creativity - How unique is the sculpture? What was creative about the material choices and how they were used to create the design?
D. Image Quality - How well was the process documented and the final design captured in a series of 5 images?
E. Group Evaluation - How well did each group member participate in the design, construction, and documentation of the sculpture?
|
|


Week 8
WED 6/1 - Team Questions
- One team member should create a new Google Doc and title it as the theme for your Jeopardy board
- Share it with all of your team members (student#@hcps.us) and with me ([email protected])
- Type out the separate category headings
- Each person must submit one question beneath each heading (place your initials next to the question you created)
- There can be NO repeat questions (rewrite them together)
- When all questions are complete, review them together and re-order the questions from easiest to the most difficult
- The top 5 questions from each category will be chosen from each category to build the Jeopardy boards on Friday
TEAM 1 & 4: The Camera & Film Processing CATEGORIES
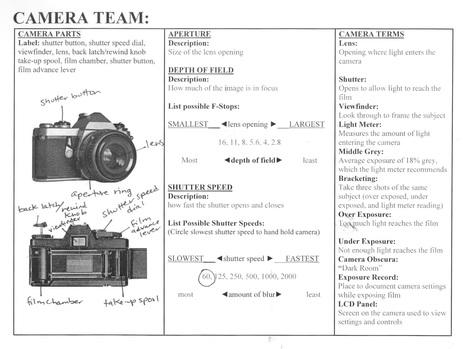
- Camera Parts
- Shutter, Viewfinder, Lens, Take-up Spool, Film Chamber, Light Meter, Back Latch, Film Advance Lever, Shutter Speed Dial
- Exposure Control
- Aperture, F-Stops & Depth of Field (Great & Shallow), Shutter Speed, Camera Blur, Bracketing, Film Speed & Film Grain
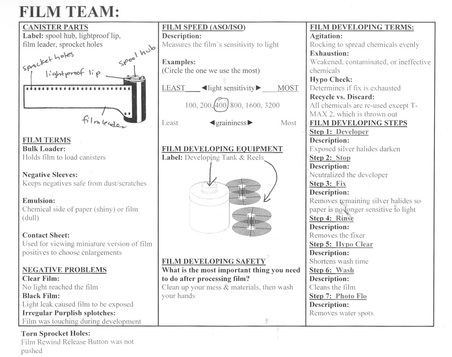
- Canister Parts
- Spool, Spool Hub, Light Proof Lip, Film Leader, Bulk Loader, Sprocket Holes
- Film Processing Terms
- Developing Tanks & Reels, Agitation, Exhaustion, Recycle/Discard, Safety
- Film Processing Steps
- T-MAX, Stop, Fix, Hypo Check, Hypo Clear, Photoflo
- Problem Negatives
- Clear Film, Black Film, Torn Sprocket Holes, Purple Splotches, Overexposure & Underexposure
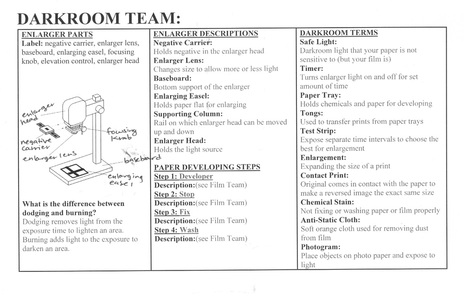
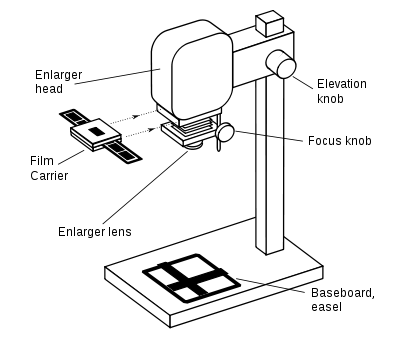
- Enlarger Parts
- Negative Carrier, Enlarger Head, Baseboard, Focusing Knob, Elevation Control, Enlarger Lens, Enlarging Easel, Supporting Column, Timer
- Paper Developing Terms
- Negative Sleeves, Contact Sheets, Test Strips, Agitation, Exhaustion, Safety
- Paper Developing Steps
- Developer, Stop, Fix, Wash
- Darkroom Terms
- Safelight, Timer, Tongs, Antistatic Cloth, Emulsion, Silver Halides, Filters, Dodging & Burning
- Alternative Processes
- Camera Obscura, Photograms, Contact Prints, Toning, Hand Tinting, Sabattier
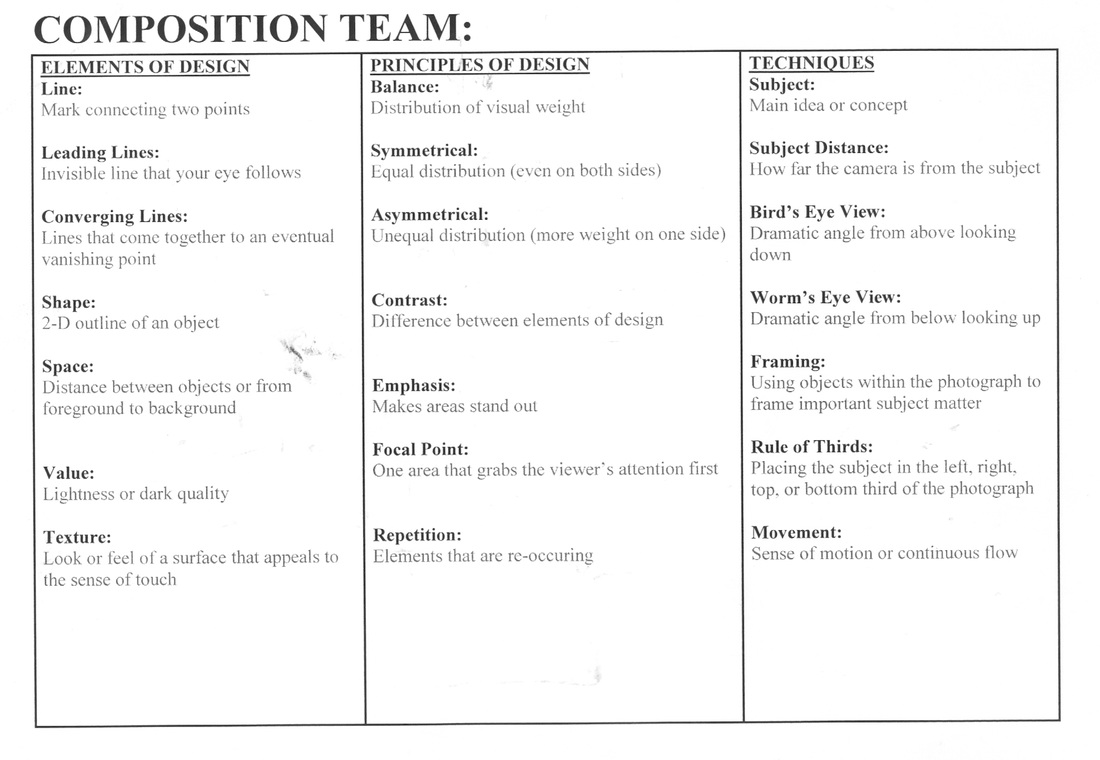
- Compositional Techniques
- Subject, Subject Distance, Bird's Eye/Worm's Eye View, Framing, Rule of Thirds
- Elements of Design
- Line, Implied Line, Shape (Organic & Geometric), Space, Value, Texture, Form
- Principles of Design
- Balance (Symmetrical & Asymmetrical), Contrast, Emphasis, Focal Point, Rhythm, Pattern, Repetition Unity
- Steps of Art Criticism
- Description, Analysis, Interpretation
FRI 6/3 - Build Jeopardy Board
JEOPARDY GAME BUILDING INSTRUCTIONS
Instructions: Find your team below and click to the right to edit your Jeopardy Board. Use the corresponding password. Your questions cannot overlap any of the already used terms, so please read them carefully. When you are ready to enter you questions, click on the open category and type your questions and answers in the 5 spots going down your category column. The highest point values should be reserved for the most difficult questions. Click save game file when you are done.
Instructions: Find your team below and click to the right to edit your Jeopardy Board. Use the corresponding password. Your questions cannot overlap any of the already used terms, so please read them carefully. When you are ready to enter you questions, click on the open category and type your questions and answers in the 5 spots going down your category column. The highest point values should be reserved for the most difficult questions. Click save game file when you are done.
|
TEAM 1:
TEAM 2:
TEAM 3:
TEAM 4: TEAM 5: TEAM 6:
|
Edit - password = team1
Edit - password = team2
Edit - jeopardylabs.com/edit/alternative-processes-art-criticism2- password = team33
Edit - jeopardylabs.com/edit/the-camera-film-processing2 - password = team4
Edit - jeopardylabs.com/edit/the-darkroom-print-developing - password = team5
Edit - jeopardylabs.com/edit/alternative-processes-art-criticism3 - password = team5
|
Week 9
TUE 6/7 - Play Jeopardy
THU 6/9 - Exam Print - Close down darkroom (not open on exam day) - Print must be dry and submitted in the To Grade folder before you leave
THU 6/9 - Exam Print - Close down darkroom (not open on exam day) - Print must be dry and submitted in the To Grade folder before you leave
FINAL EXAM
THIRD NINE WEEKS
WEEK 1
TUE 2/9 - 1st Toned Test Strip Due
HOMEWORK: Bring 2 film cassettes to roll film next class
THU 2/11 - 1st Tone Print and 2nd Test Strip Due - Roll Film
HOMEWORK: Shoot 2 rolls of bracketed film for the Hand Tinting Project. Film due next Thursday, 2/18!
Required Reading Assignment - Answer the questions at the end on a separate sheet of paper or on a new Google Doc
WEEK 2
TUE 2/16 - 2nd Toned Print Due (TONING PROJECT COMPLETED!)
THU 2/18 - Develop 2 rolls of film for the Hand Tinting Project
ART GUILD meeting after school
THU 2/18 - Develop 2 rolls of film for the Hand Tinting Project
ART GUILD meeting after school
Toning Rubric:
Completion Grade:_____/40pts
1 Sepia Tone Test Strip (10pts)
1 Sepia Tone 8x10 (10pts)
1 Blue Tone Test Strip (10pts)
1 Blue Tone 8x10 (10pts)
Technical Grade:_____/30pts
Good Contrast (10pts)
Sharp Focus (10pts)
No Dust/ Stains (10pts)
Creative Grade:_____/30pts
Unique Subject Matter (10pts)
Strong Compositions (10pts)
Appropriate Tone (10pts)
ALTERNATE ASSIGNMENT: (Extra Credit)
Some Research Links:
http://www.reframingphotography.com/content/non-silver-historic-printing-processes
http://www.alternativephotography.com/wp/tag/vandykes
http://www.alternativephotography.com/wp/toning/a-non-silver-manual-cyanotype
- Create a new Google Doc inside your B4 folder titled "Alternate Assignments"
- Research VAN-DYKE BROWN and CYANOTYPE Processes. Include the following information for each:
- Describe who invented the process, when, where, and how
- Explain the chemistry involved and steps involved
- Provide 3 or more examples with dates, titles, and artist names
Some Research Links:
http://www.reframingphotography.com/content/non-silver-historic-printing-processes
http://www.alternativephotography.com/wp/tag/vandykes
http://www.alternativephotography.com/wp/toning/a-non-silver-manual-cyanotype
SECOND NINE WEEKS
Week 1
MON 11/9 - DEVELOP SECOND ROLL OF FILM!!
Complete Outcome Column on 1st Exposure Record and Re-submit with 1st Contact Sheet
REMEMBER: Light positive = dark negative = overexposure, Dark positive = light negative = underexposure)
Reload film cassette and camera by Friday - 3rd roll of film due next Tuesday
KEY TERMS:
DEPTH OF FIELD ALTERNATE ASSIGNMENT (if you do not have both rolls of film):
Complete Outcome Column on 1st Exposure Record and Re-submit with 1st Contact Sheet
REMEMBER: Light positive = dark negative = overexposure, Dark positive = light negative = underexposure)
Reload film cassette and camera by Friday - 3rd roll of film due next Tuesday
KEY TERMS:
- Portraiture: photograph of a person or group of people that displays the expression, personality, and mood of the subject. Like other types of portraiture, the focus of the photograph is usually the person's face, although the entire body and the background or context may be included
- Great Depth Of Field: is the distance between the nearest and farthest objects in a scene that appear acceptably sharp in an image
- Shallow Depth Of Field: is the kind in which part of the frame is soft or out of focus. Thus, the areas of focus or sharpness are limited
- Contact Sheet: a piece of photographic paper onto which several or all of the negatives on a roll of film have been contact printed
DEPTH OF FIELD ALTERNATE ASSIGNMENT (if you do not have both rolls of film):

Describe the subject matter, aperture, and shutter speed used for 5 images on the contact sheet:
1.
2.
3.
4.
5.
Then...
Review the Depth of field Simulator Here
Describe what you observed working with the simulator.
Place your answers in the TO GRADE folder!
WED 11/1
REVIEW PRINT DEVELOPING AND FILM DEVELOPING RULES
Enlarger Stations: All items have # for you station and include negative carrier, scissors, glass, cardboard (turn in what's not yours!)
Chemical Safety: Do not mix tongs, rock gently to prevent spills, allow to drain before moving to the next tray
For film: Do not recycle in the wrong container, do not leave tops off of containers, put back in order to prevent confusion, CLEAN SPILLS!
Clean up: Return all supplies exactly where you found them!!
DEADLINES:
2 Contact Sheets and 1st Exposure Record (with Outcome complete) should be in the "TO GRADE" folder TODAY
Mark the Outcome on your 2nd Exposure Record - Get this checked off, take it with you!
Extra Credit Alternate Assignments: Turn in Exposure Questionnaire Handout or get online for Depth of Field Questions
From looking at both contact sheets, you will select an image reflects good composition and exposure
You will be creating a test strip and making an enlargement of this image as one of your final 5x7 prints
FRI 11/13
How to make a print:
- Cut paper into test strips and 5x7 sheets
- You will select a positive from your contact sheet and place the negative into the negative carrier
- Make sure emulsion side is down and horizontally flipped
- Place the easel underneath enlarger lens and use the elevation knob to enlarge your image (5x7)
- Use the easel as a tool to focus your image
- Make sure you are TWO stops down from the brightest stop
- Turn off light and place test strip on baseboard with glass over: make a test strip from 1-5 sec increments
- Find proper exposure time to create a print
- Use a 5x7 sheet of paper and place into easel
- Expose paper and develop
VOCABULARY ALTERNATE ASSIGNMENT
DEADLINES:
FINAL Prints (3) - any combination of 8x10's or 5x7's:
1 = shallow depth of field
1 = great depth of field
1 = humorous subject utilizing depth of field
DUE: December 2
Week 2
TUE 11/16 - DEVELOP THIRD ROLL OF FILM!! - Turn in Exposure Record - Make 3rd Contact Sheet
PHOTOGRAPHY STATION ALTERNATE ASSIGNMENT
THU 11/18
PHOTOGRAPHY STATION ALTERNATE ASSIGNMENT
THU 11/18
Dodging-Holding back the image-forming light from a part of the image projected on an enlarger easel during part of the basic exposure time to make that area of the print lighter
|
Burning-Giving additional exposure to part of the image projected on an enlarger easel to make that area of the print darker. This is accomplished after the basic exposure by extending the exposure time to allow additional image-forming light to strike the areas in the print you want to darken while holding back the image-forming light from the rest of the image
|
Original Article: Magnum and the Dying Art of Darkroom Printing
Additional Article: Marked Up Photographs Show How Iconic Prints Were Edited in the Darkroom
DEADLINES:
Submit you final Contact Sheet along with the completed Exposure Record with the Outcome
Complete 1st Print
Additional Article: Marked Up Photographs Show How Iconic Prints Were Edited in the Darkroom
DEADLINES:
Submit you final Contact Sheet along with the completed Exposure Record with the Outcome
Complete 1st Print
Week 3
Week 4
MON 11/30 - Complete 3rd Print
WED 12/2 - THREE FINAL PPRINTS (any combination of 8x10's or 5x7's) MUST BE TURNED IN TODAY!
1 = shallow depth of field
1 = great depth of field
1 = humorous subject utilizing depth of field
*You must write the areas you dodged and burned on the back of each print to receive full credit!
THU 12/3 ART GUILD
FRI 12/4 - FINAL CRITIQUE
Access you Google Account when you are finished with the written portion of the critique
Instructions:
GO to www.google.com - Sign In (use the below information if you have not yet set up your HCPS account)
USERNAME = student#@hcps.us
PASSWORD = birthday (ex: 11221999) - Change your password and WRITE IT DOWN!
Go to Apps - Google Drive
Create Folder Name: A2 LASTNAME or A3 LAST NAME
Share with [email protected] - Can edit
HW: Bring in 2 Film Cassettes next week!
Week 5
TUE 12/8 - Access your google drive and share your new folder with me if you have not already done so (instructions above)
Create New Google Slides - Title: Famous Photographer Research Assignment
THU 12/10 - Famous Photographer Research Assignment
Review previous Exposure Records for 1 on 1 conferencing
Load Film Cassettes - 2 ROLLS OF FILM DUE NO LATER THAN TUE 1/5 (the day we return from Winter Break)
Create New Google Slides - Title: Famous Photographer Research Assignment
THU 12/10 - Famous Photographer Research Assignment
Review previous Exposure Records for 1 on 1 conferencing
Load Film Cassettes - 2 ROLLS OF FILM DUE NO LATER THAN TUE 1/5 (the day we return from Winter Break)
Week 6
MON 12/14 - Famous Photographer Research Assignment
Review previous Exposure Records for 1 on 1 conferencing
Load Film Cassettes
WED 12/16 - Famous Photographer Research Assignment
Load Film Cassettes
FRI 12/18 - Famous Photographer Research Assignment
2 ROLLS OF FILM DUE NO LATER THAN TUE 1/5 (the day we return from Winter Break)
Review previous Exposure Records for 1 on 1 conferencing
Load Film Cassettes
WED 12/16 - Famous Photographer Research Assignment
Load Film Cassettes
FRI 12/18 - Famous Photographer Research Assignment
2 ROLLS OF FILM DUE NO LATER THAN TUE 1/5 (the day we return from Winter Break)
Week 7
TUE 1/5 - DEVELOP 2 ROLLS OF FILM
THU 1/7 - TURN IN 2 CONTACT SHEETS AND EXPOSURE RECORDS WITH OUTCOME COMPLETE! - ART GUILD
THU 1/7 - TURN IN 2 CONTACT SHEETS AND EXPOSURE RECORDS WITH OUTCOME COMPLETE! - ART GUILD
Week 8
MON 1/11 - 1st Print Due
WED 1/13 - 2nd Print Due
FRI 1/15 - 3rd Print Due
WED 1/13 - 2nd Print Due
FRI 1/15 - 3rd Print Due
Week 9
WED 1/20 - Exam Review
THU 1/21 - ART GUILD
FRI 1/22 - Exam Review
THU 1/21 - ART GUILD
FRI 1/22 - Exam Review
MIDTERM EXAM
MON 1/26 - A3
THU 1/28 -A2
THU 1/28 -A2
|
|
| exam_review_key.pdf |
FIRST NINE WEEKS
Week 1
TUE 9/8 - Review Class Expectations and Suplies
THU 9/10 - Intorduction to the Camera Obscura & Darkroom Processing
The Camera Obscura & The History of Photography
The Camera Obscura & The History of Photography
|
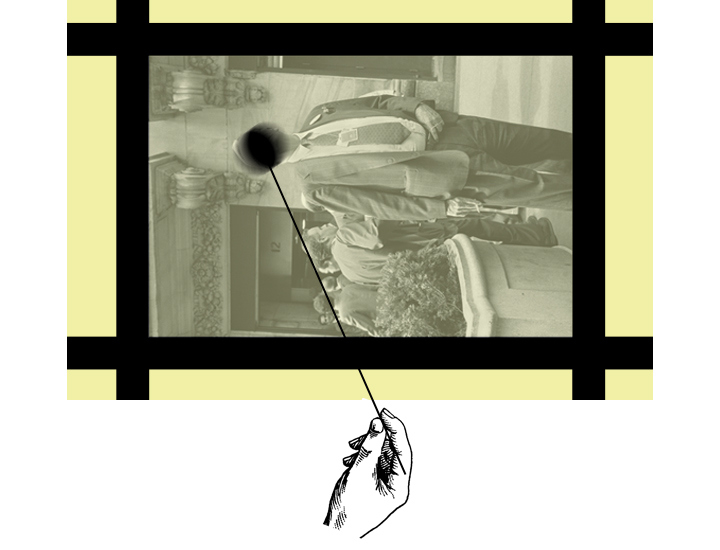
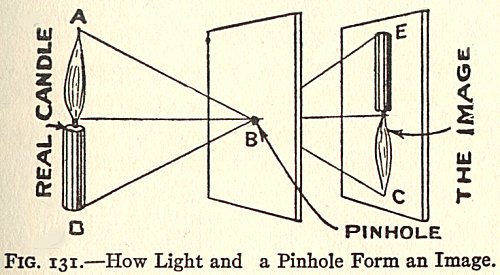
A few centuries before photography was created, people already knew the principles of how light travelling through a tiny pinhole would project an image upside down and backwards. However, no printing was possible at the time because preserving light turned out to be a lot harder task than projecting it. The instrument that people used for projecting pictures was called the Camera Obscura (which is Latin for the Dark Room). It is believed that Camera Obscura was invented around 13-14th centuries, however there is a manuscript by an Arabian scholar Hassan ibn Hassan dated 10th century that describes the principles on which camera obscura works and on which analogue photography is based today.history of photography
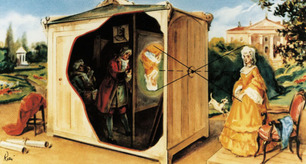
Camera Obscura is essentially a dark, closed space in the shape of a box with a hole on one side of it. Photography, the way it was developing, was always believed to be the killer of the fine art. However, it is believed that the photo principles were widely used by Renaissance artists like Leonardo, Michelangelo and others. In the mid 16th century, Giovanni Battista della Portacentury, an Italian scholar, wrote an essay on how to use camera obscura in aid of making the drawing process easier. The process of using camera obscura looked very strange and frightening for the people at those times and the Giovanni Battista had to drop the idea after he was arrested and prosecuted on a charge of sorcery. |
|
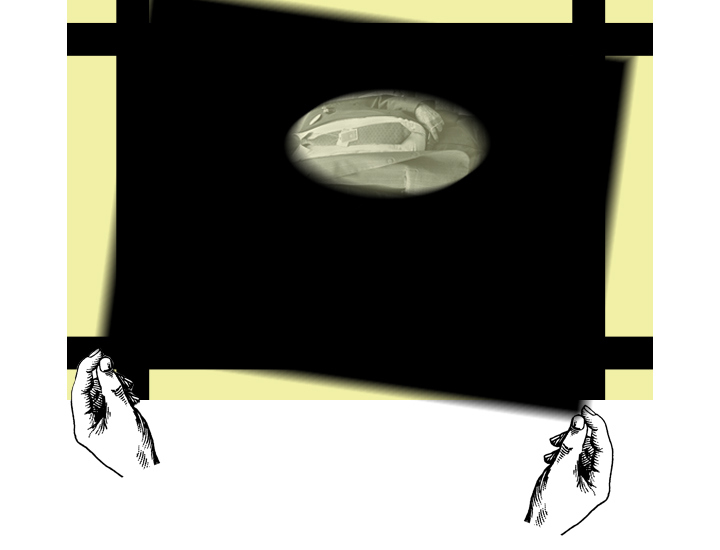
ABELARDO MORELL - Camera Obscura: Rooms with a ViewI made my first picture using camera obscura techniques in my darkened living room in 1991. In setting up a room to make this kind of photograph, I cover all windows with black plastic in order to achieve total darkness. Then, I cut a small hole in the material I use to cover the windows. This opening allows an inverted image of the view outside to flood onto the back walls of the room. Typically then I focused my large-format camera on the incoming image on the wall then make a camera exposure on film. In the beginning, exposures took from five to ten hours.
Over time, this project has taken me from my living room to all sorts of interiors around the world. One of the satisfactions I get from making this imagery comes from my seeing the weird and yet natural marriage of the inside and outside. A few years ago, in order to push the visual potential of this process, I began to use color film and positioned a lens over the hole in the window plastic in order to add to the overall sharpness and brightness of the incoming image. Now, I often use a prism to make the projection come in right side up. I have also been able to shorten my exposures considerably thanks to digital technology, which in turn makes it possible to capture more momentary light. I love the increased sense of reality that the outdoor has in these new works .The marriage of the outside and the inside is now made up of more equal partners. |
Artists Still Using the Camera Obscura Today
Inverted view of Central Park
|
HW = Bring in Pinhole Container (we must make it light tight, so thick cardboard works best, no thin plastic or metal containers
Week 2
MAKING A PINHOLE CAMERA
MAKING A PINHOLE NEGATIVE:
USE A PIECE OF TAPE AND LABEL EACH NEGATIVE WITH YOUR NAME AND THE TRIAL NUMBER
ON YOUR WORK RECORD, INCLUDE THE TRIAL #, EXPOSURE TIME, AND OUTCOME
Pinhole Negatives - Grading (10pts per Trial):
2pts - Pinhole Negative in To Grade folder
2pts - Pinhole Negative labelled with Name and Trial #
2pts - Trial # written on Work Record
2pts - Shutter Speed written on Work Record
2pts - Expsosure Outcome written on Work Record
EXPOSURE KEY:
Up arrow = Overexposed (too much light) Down Arrow = Underexposed (not enough light)
Check = Correct Exposure (black, white, and grey values) X = No Exposure (solid black or white)
PINHOLE EXAMPLES:
- Bring in a container to make a pinhole camera.
- Make your container light tight
- Add a lens and shutter to your pinhole camera.
MAKING A PINHOLE NEGATIVE:
- Using a pinhole camera, produce at least one strong negative image.
- Photo should be in focus.
- Don’t hand-hold your camera.
- Photo should be properly exposed with good contrast.
- You should observe values ranging from light to dark.
- Your darkest shadow should be a very rich black.
- Your brightest highlight should be absolutely white.
- Photo should be properly developed with no chemical stains.
- Always agitate and follow the designated developing times.
- Photo should be carefully composed.
- Get close to your subject.
- Use unique angles.
- Position your subject using the rule of thirds.
USE A PIECE OF TAPE AND LABEL EACH NEGATIVE WITH YOUR NAME AND THE TRIAL NUMBER
ON YOUR WORK RECORD, INCLUDE THE TRIAL #, EXPOSURE TIME, AND OUTCOME
Pinhole Negatives - Grading (10pts per Trial):
2pts - Pinhole Negative in To Grade folder
2pts - Pinhole Negative labelled with Name and Trial #
2pts - Trial # written on Work Record
2pts - Shutter Speed written on Work Record
2pts - Expsosure Outcome written on Work Record
EXPOSURE KEY:
Up arrow = Overexposed (too much light) Down Arrow = Underexposed (not enough light)
Check = Correct Exposure (black, white, and grey values) X = No Exposure (solid black or white)
PINHOLE EXAMPLES:
| PINHOLE PHOTOGRAPHY.pptx |
PAPER DEVELOPING STEPS:
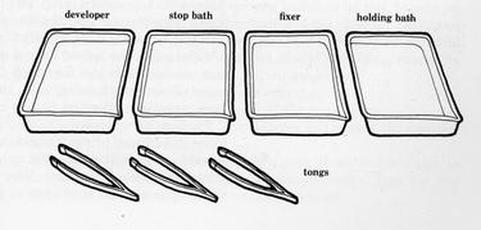
1. Developer: 1 1/2 - 3min (exposed areas begin to darken) 2. Stop: 30 sec (stops the development)
3. Fix: 4 min (removes remaining light sensitive chemicals) 4. Wash: 10 min (cleans the print)
VOCABULARY:
Agitate - rock tray back and forth to spread chemicals evenly
Aperture - size of the lens opening
Shutter Speed - length of exposure time (long exposure = slow shutter speed, short = fast)
Tongs - Used to transfer prints from each tray to avoid contact with skin
Complete Pinhole Trials 1 & 2
HW = ALL PHOTO SUPPLIES DUE NEXT WEEK
Week 3
Complete Pinhole Trials 3 - 6
HW = ALL SUPPLIES NEED TO CHECKED OFF DURING THE LAST CLASS THIS WEEK
Week 4
Complete Pinhole Trials 7 & 8
| Enlarger Vocabulary & Contact Printing |
MAKING A PINHOLE POSITIVE:
- Using the negative image, make a contact print by following the steps listed below.
- Place your test strip, emulsion side up, on the enlarger’s baseboard.
- Place your pinhole negative, face down, on top of your test strip.
- Place a clean sheet of glass over top of the negative and test strip.
- Set your timer for 10 seconds and open the enlarger lens up two stops.
- Expose the image in 2 second intervals using a piece of cardboard to move across your test strip.
- Develop your test strip and evaluate the results.
- Choose a time and expose a sheet of photo paper cut the same size as your negative.
Week 5

HW: Bring in 3 or more PHOTOGRAM OBJECTS
Week 6
TUE 10/13 Begin Photogram Test Strips
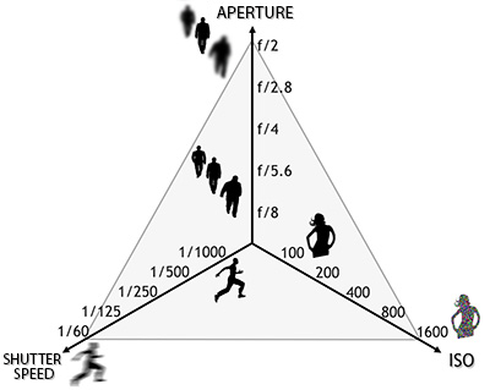
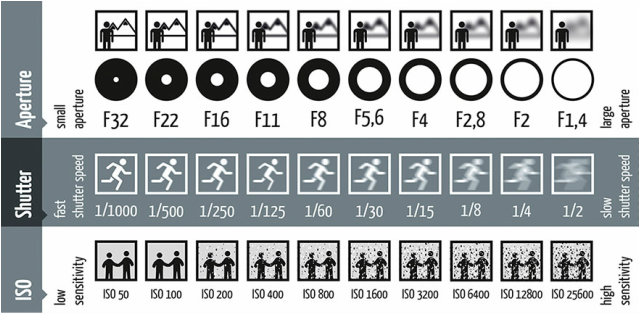
THU 10/15 The Exposure Triangle: Aperture, Shutter Speed, and ISO
THU 10/15 The Exposure Triangle: Aperture, Shutter Speed, and ISO
| understanding_the_exposure_triangle.doc |
|
|
HW: Bring in Cameras everyday until your first shooting assignment
Week 7
HW: Bring in 1 Film Casette to roll film - Cameras need to be in class all week!
MON 10/19 - Choose 1 or 2 of your strongest photogram compositions - Begin contact printing
Final Photogram arrangement must include min of 8 (4 positives + 4 negatives)
Complete notes on exposure - Identify your camera light meters
WED 10/21 - Test Light Meters - Bring a jacket, this will be outdoors! - Practice bracketing exercise
Continue contact printing positives and negatives
Roll film cassette
FRI 10/23 - Load film into camera
Week 8
TUE 10/27 - Artist in Residence
Film Developing Process
Finish ALL FOUR NEGATIVES AND ALL FOUR POSITIVES to complete Photogram prints
THU 10/29 - Practice Rolling Film
Turn in assembled Photogram project
HW = Complete all 24 exposures to develop film on MONDAY!
Film Developing Process
Finish ALL FOUR NEGATIVES AND ALL FOUR POSITIVES to complete Photogram prints
THU 10/29 - Practice Rolling Film
Turn in assembled Photogram project
HW = Complete all 24 exposures to develop film on MONDAY!
Week 9
MON 11/2 - DEVELOP FIRST ROLL OF FILM!!
THU 11/5 - Depth of Field PowerPoint
HOT DATES:
1st Roll: Shot and brought into class by November 2nd
2nd Roll: Shot and brought into class by November 9th
3rd Roll: Shot and brought into class by November 16th
FINAL Prints (3) - any combination of 8x10's or 5x7's:
1 = shallow depth of field
1 = great depth of field
1 = humorous subject utilizing depth of field
DUE: December 1
